|
|
|||||||||||||||||||||||
|
6. Kerosene heaters and cookers
12.
Electrical; generators
Miles Stair's
SURVIVAL Miles
Stair's
SURVIVAL |
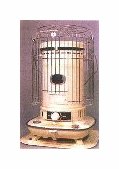
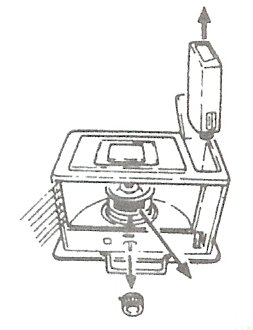
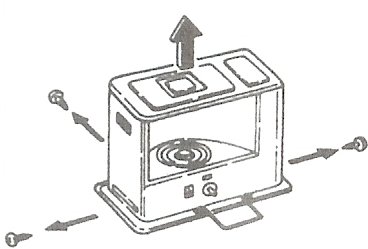
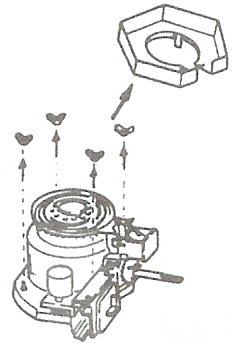
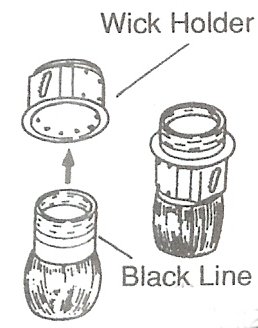
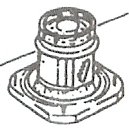
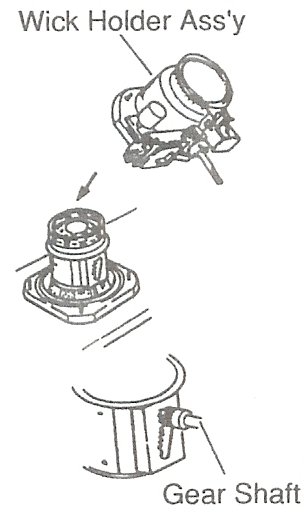
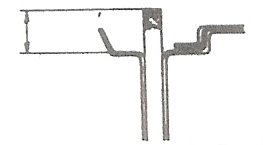
KEROSENE HEATER WICK REPLACEMENT GENERIC INSTRUCTIONS FOR UNPINNED WICKS by Miles Stair Instructions for wick replacement usually come with the replacement wick There are, however, a lot of older heaters to be found with spare wicks but no clue as to how to install new wicks. Because most of the older heaters use an unpinned wick, and many of them are radiant heaters, what follows could be considered as generic instructions. Details will vary; some cabinets are attached to the base in different ways, the wick adjuster assembly will look a little different, etc. But the basic design philosophy must remain the same - there is a wick, it must be raised and lowered, the usual method of wick movement is via a gear shaft and turning knob, etc. These instructions are simply give you a clue to what to look for as you disassemble your heater to replace the wick. The illustrations are thumbnails: click on the illustration to see a full size image, then use the "back" button on your browser to return to this page.
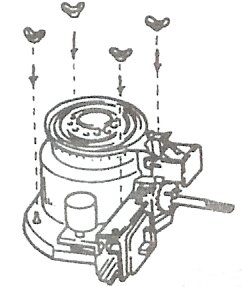
Congratulations! You have installed a new wick in your kerosene heater. Now all that is left to do is to find all the screws you took out during assembly, and reassemble the heater. First the electric igniter is replaced, then the wind shield (if any) is installed, and the base of the unit is ready for the cabinet. Lower the cabinet GENTLY over the base, with the top tilted toward you (the front), and settle it down onto the base. Look around the base of the unit: sometimes there will be tabs for the base screws, and you need to make sure those tabs are on the INSIDE of the cabinet - not showing! Now the screws can be reinstalled to hold the cabinet to the base. Next, put the wick raising knob back on - plus any other knobs you may have had to remove. At this point, stop everything and try out the wick raising assembly and the safety tip-over switch. Check to be sure the wick raises the proper amount (about 5/16" to no more than 1/2"), then shut off the heater to make sure the wick retracts by spring tension down inside the wick tube - that is your safety device! Make sure the igniter moves into the wick and glows. Everything work? Great. Now you can open the grill and replace the catalytic converter. Put the fuel tank back into the cabinet - full of fuel up to half way on the sight level - and sit back and admire your work. DO NOT attempt to light the heater for at least 20 minutes, as the wick you installed is completely dry and needs to suck up fuel via capillary action before you can light the heater! A half hour up? Now you can test your handiwork. Light the heater and wait for it to heat up completely. If you have installed the wick to a uniform height all around, the flame will be uniform. If one edge of the flame is too high, you can trim the wick a little lower at that spot when the heater is cool. If half of one side of the flame is considerably higher than the other, you will need to reinstall the wick again, making sure that side is installed lower. Notice that the flame is a little too high? That is because you are burning a brand new wick that has no carbon build-up on the top surface. In a week that problem will be solved. In the meantime, burn the heater with the wick turned to the lowest setting, and the wick height should be ideal. After a week or so of use and burning dry once or twice, the wick will be all "settled in" and maintain that capillary action for a whole season, so you won't need to take the heater apart and raise the wick for a whole season of use, and the highest setting on your control knob should have the flame at precisely the right height for efficient, clean, odor free burning for a long time. You did it! These generic instructions also apply to convection heaters - only the cabinet is different. With a convection heater, the tower is removed with 3 or 4 thumb screws at the base of the tower, lift it straight up and off, and the wick adjuster assembly is essentially the same as with a radiant heater.
|
|
|||||||||||||||||||||

