|
A guide to self reliant living |
||||||||||||||||
|
6. Kerosene heaters and cookers
12.
Electrical; generators
Miles Stair's SURVIVAL
Miles Stair's
SURVIVAL |
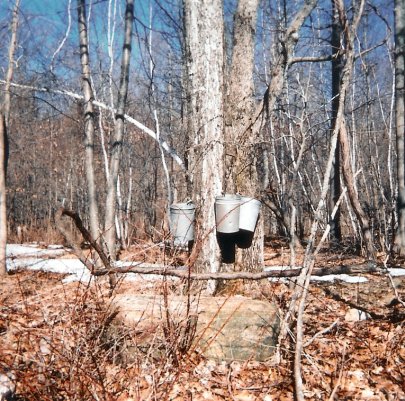
MAKING MAPLE SYRUP AT HOME by New England Gardener I can't tell you if you can make Maple Syrup where you live, but I believe it can be made in most of the Northeast, and anywhere else with Sugar Maple trees and similar weather. It takes about 40 quarts of sap to make one quart syrup. You tap the trees in mid Winter, and Sap will start to flow when the days are warm, and the nights are cold. The farther above freezing it gets during the day, and the farther below freezing it gets overnight, the more the sap will run.
Click on the thumbnail photo to enlarge, then use the "back" button on your browser to return here.
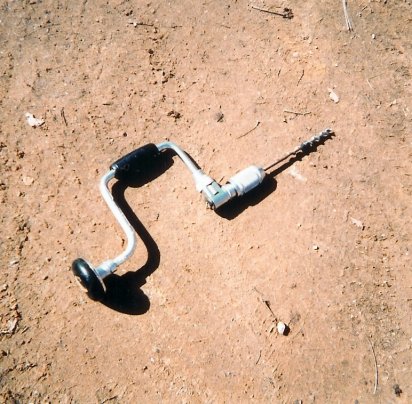
Click on the thumbnail photo to enlarge, then use the "back" button on your browser to return here.
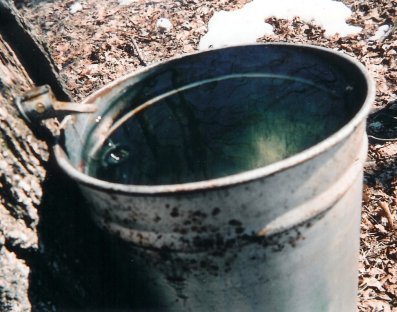
Click on the thumbnail photo to enlarge, then use the "back" button on your browser to return here. To get ideas, let's look at a traditional commercial Sap House, where the boiling takes place. It will have a large vent at the peak of the roof for the steam to escape, and vents in the upper half of the side walls for fresh air to enter. There will be some way to control this air flow, to keep it efficient as the wind and temperature changes. The boiler will be a long rectangular pan, with a firebox under it. The stack will extend well above the roof, for a good draft. The sap will be added at the flue end, since it is hotter, and the pan will have a maze of baffles in it. At the front of the firebox, where the fuel is added, there will be a spigot, so the syrup can be drawn off once the sugar content is high enough. It is run 24 hours a day through the Sap season, which is usually 4 to 6 weeks, depending on the weather. The best quality syrup will be made in the first few weeks.
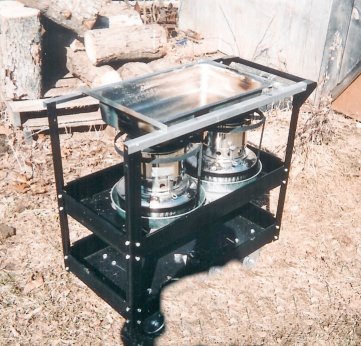
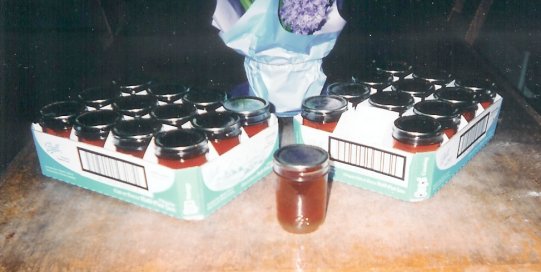
The simplest home set up is to boil down a single large batch outside. You will need a large shallow pan, 4 to 6 inches deep. These are used in commercial kitchen steam tables, so you might try a dealer in used restaurant equipment. A box stove or a laundry stove, with the stovetop lids removed, so the flames touch the pan, is much more efficient than an open fire or a masonry pit or cook out grill. You need a tall chimney to keep the smoke smell from getting into the syrup. Now let's do a little math. Fill the pan 1/4 full of water, and pour it off and measure it. Multiply times 40, and that's how much sap you should do in one batch. Keep the pan full, and boiling very hard, until all of the sap is in it, then gradually lower the heat so it boils, but doesn't burn. As you get closer to finishing, it may boil up, so you need two people right there to remove it from the heat, or you could bring it inside to finish it on a kitchen stove. To test to see if it's nearly ready, drop a spoonful on a saucer, and tip it steeply. It should leave a thick trail behind it, as it runs down. Now it will keep for awhile like this, but it is better to boil a little longer. Eventually, you will not be able to stir in down with a spoon, like jelly making, and then it will cool to be very thick. We pack it in hot jars from the oven, and put on sterilized lids, and process in a water bath canner for 20 minutes. This may not be long enough by today's standards, for long term storage. Use small jars, that you will use up in a month or so. If you won't be keeping it through the summer, don't bother to process it, just use clean hot jars with sterilized lids. If you have a "Summer Kitchen", that would be an ideal place to work. What we do, is make it on the kitchen wood fired cook stove. You could use any woodstove with a cook top, or several burners on any range. The multi burner Butterfly stoves, or make a wide frame for two or more one burner stoves. It takes a lot of heat, so the economy of kerosene or wood is important. With lots of fresh air to carry away the steam, your kitchen won't overheat. Since we are inside, it's much more convenient, but the steam it gives off in the house is a problem. Even with exhaust fans, it's hard to make 40 quarts over a long season. We crowd the top of the stove with shallow pans, and preheat sap in a canning kettle.
Sap should be kept below 40 degrees, or heated above 140 degrees to keep it from fermenting or spoiling. I use a large ladle to move the sap to the hottest pan over the small fire box, and then work backwards, filling from the next hottest to the coolest one, and fill that from the preheated kettle. Once you set all this up, it doesn't take long to move the sap, perhaps every half hour. While you finish a small batch, it will take your full attention. When the hottest pan gets close to being syrup, ladle out a large saucepan with a pouring spout or a square deep steam table pan, 3/4 full. Heat it on a single burner you can control better. A Kerosene cook stove or camp stove is ideal. If you use a kitchen range with a hood over it, the steam will melt old grease out of it, and it will drip down into the syrup. I put my portable stove right in front of our electric range, and use the fan in the hood. A box fan pushing air out a window helps too. A small fan to move air OVER the sap pans will make it go faster too, but don't cool the stove itself, or the sides of the pans. I gather daily, before dark.
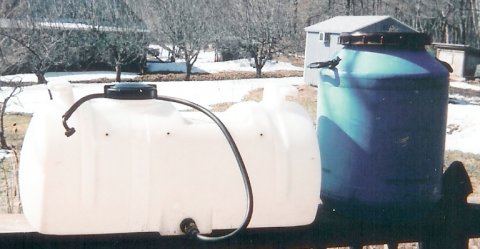
I like the barrel on the hand truck better, because I can wheel it right into the kitchen, to draw from. Then I can move it to a place between 32 and 40 degrees until I need more. You could use a sturdy wagon or make a cart something like Miles did for his generator and kerosene heaters. If you have open containers at the tree, the sap should be filtered. I just use a milk filter because I have one, but you could make something like the juice strainer.- New England Gardener 3.16.2012. Note from Miles. New England Gardener has greatly expanded this article on making maple syrup. It is a great article with many photos and updated information that is fascinating to read. Please visit New England Gardener's website to read the updated article, and if you need garden seeds, now is the time to get them from New England Gardener.
|
1. Food | 2.
Manna Meals | 3. Water |
4. Sanitation | 5. Medical, health |
| 6. Kerosene heaters and cookers | 7. Lighting | 8. Wood cooking and heating | | 9. Communications | 10. Essential Tools | 11. Home built items | | 12. Electrical; generators and power | 13. War preparedness | 14. Gardening | |
|
||||||||||||||