 his is to be a brief
introduction to blacksmithing, an art and a science that is so
old as to be almost beyond reckoning. I cannot possibly attempt
to make a Master Smith out of everyone who reads this article.
There are many books written on the subject, and the authors,
those learned scholars who wield the hammer beside forge and
anvil would be most upset if they found out that I could teach
the subject in one article, especially considering that I am only
a "shade tree" smith myself.
his is to be a brief
introduction to blacksmithing, an art and a science that is so
old as to be almost beyond reckoning. I cannot possibly attempt
to make a Master Smith out of everyone who reads this article.
There are many books written on the subject, and the authors,
those learned scholars who wield the hammer beside forge and
anvil would be most upset if they found out that I could teach
the subject in one article, especially considering that I am only
a "shade tree" smith myself.
 I am not prepared to say which comes first; the Mark of the
Beast, the Rapture, or Tribulations. Either of the former events
will be immediately obvious. Proceed accordingly, depending upon
how the events unfold. Tribulation is a relative term. Suffice it
to say, however, that the Biblical version of Tribulation is not
something on the order of having Windows crash on you.
I am not prepared to say which comes first; the Mark of the
Beast, the Rapture, or Tribulations. Either of the former events
will be immediately obvious. Proceed accordingly, depending upon
how the events unfold. Tribulation is a relative term. Suffice it
to say, however, that the Biblical version of Tribulation is not
something on the order of having Windows crash on you. For the purpose of these pages of text, I will define the
post-Apocalyptic world as one in which a major cataclysmic event
of some kind has occurred, or is about to occur that will
severely disrupt society. Our distribution network will have
broken down, and widespread law and order will become a thing of
the past. Only little pockets of order will exist in a sea of
chaos.
For the purpose of these pages of text, I will define the
post-Apocalyptic world as one in which a major cataclysmic event
of some kind has occurred, or is about to occur that will
severely disrupt society. Our distribution network will have
broken down, and widespread law and order will become a thing of
the past. Only little pockets of order will exist in a sea of
chaos.
A post-apocalyptic smith will not necessarily be a replica of the
Master Smith of 1776. There will be gaps in his knowledge that
only experience not presently available can fill. Many modern
smiths do not, for example, know how to make files or shoe
horses. They will, however, have a wealth of knowledge and
materials that would amaze our 18th century Master Smith. They
may have Templesticks, a power hammer, modern steels that are
air-hardened. They'll understand some science and engineering
that their forebears never heard of. They will find,
unfortunately in many cases, that they'll have to go back to hand
tools rather than electrically powered machines. They will find
that they cannot order propane, coal, steel, acetylene, oxygen,
or other items now commonly ordered by phone or on line. They'll
have to make do... something most smiths have had to learn even
in these times.
 The blacksmith of old was the original Angus MacGyver, and
had to be at least as inventive as that television character. Who
do you think made the first Swiss Army Knife anyway? The
post-apocalyptic smith will have to be even more inventive than
his forefathers.
The blacksmith of old was the original Angus MacGyver, and
had to be at least as inventive as that television character. Who
do you think made the first Swiss Army Knife anyway? The
post-apocalyptic smith will have to be even more inventive than
his forefathers.
The answer to the basic question (why to learn smithing in the
first place) is fairly self-evident to a "born" smith, someone
who wants to learn it just for the sake of learning it; he does
it because he can and he needs no further justification for it.
Anyone else, particularly those reading these words on Miles'
site, might need some additional motivation. He might ask, "How
will learning to do blacksmithing help me survive the end times,
or any other disaster?"
Well, life in a post-Apocalyptic world will not be easy. The
things we have all become accustomed to, like toilet paper,
feminine hygiene products, dry-cell batteries,
state-of-the-automotive-art Maybach automobiles (if one is
extremely weathy!), and telecommunications will all either be
gone completely or sharply reduced in availability. We will have
to find substitutes or trade for what we want.
I like honey, for example, but I absolutely HATE bees (You
wondered why I didn't buy the bee book, Miles?). After a nuclear
war or some natural or supernatural disaster, I won't be able to
go to Aldi's or Sam's to buy honey. I'll have to raise the bees
myself, trade other goods and services, rob a beekeeper, or do
without honey. If I thought that I could control my nerves well
enough to actually open an active hive and rob the bees of their
labor, I might consider learning how to raise the little venomous
flying thorns myself, but I don't think I could do that... hey,
even Superman has a weakness! This leaves brigandage and trade.
One is costly, one is risky and immoral. I would choose to
trade.
Trade what? Well, the beekeeper probably isn't a blacksmith, and
like me, he can't go to Fleet Farm to buy tools that he needs to
ply his trade. He, like everyone else will need to find other
sources for axes, shovels, hoes, picks, wedges, hooks, and a
thousand other tools. I need a quart of honey, he needs... say, a
boot scraper for outside his front door to keep the mud out of
the house (no electricity for the vacuum cleaner and he probably
 has other things for his wife to do than wear herself out
sweeping up dried mud). Or maybe he needs a hook to hang his
lantern on when the sun goes down. Possibly he might need a
spring for his shotgun to keep the bears out of his hives.
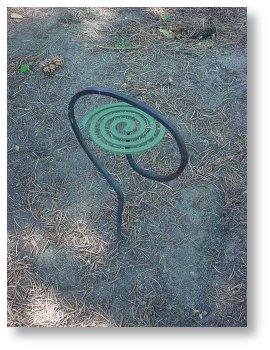
He might want something nobody ever heard of, like, for instance
a 'skeeter chaser (pictured at left). Mosquitoes and other
insect vectors spread more disease than all the sneezes in the
world.
has other things for his wife to do than wear herself out
sweeping up dried mud). Or maybe he needs a hook to hang his
lantern on when the sun goes down. Possibly he might need a
spring for his shotgun to keep the bears out of his hives.
He might want something nobody ever heard of, like, for instance
a 'skeeter chaser (pictured at left). Mosquitoes and other
insect vectors spread more disease than all the sneezes in the
world.
Virtually any essential tool can be made by a skilled blacksmith
using only the basic tools of hammer, forge, and anvil. You need
a fish-hook? Can do! How 'bout a horse shoe? No problem at all!
It might pay to remember that gasoline not being available will
make horses extremely popular all of a sudden... which will make
farriers quite sought after.
A word about farriers... a good farrier, which is a blacksmith
who specializes in horse shoeing and related enterprises is worth
at least his weight in gold. He must be part blacksmith, part
veterinarian, and it doesn't hurt to know something about
wainwrightry and harness mending. A farrier can do most simple
blacksmithing tasks, though he may not be up to things like
hardening and tempering knife blades or making a file from
scratch. A blacksmith who is not trained in working with horses
should not attempt to shoe a horse. He could end up crippling a
valuable animal... and the owner might then become upset enough
to find a new place to shove the smith's hammer... after first
heating the head to red heat in the forge!
Any steel tool can be repaired and/or refurbished by a competent
blacksmith. Many a modern smith makes a fair amount of his living
from refurbishing plow points, or at least he did ten or fifteen
years ago. Picks, axes, shovels, mattocks, broadaxes, froes,
adzes, hoes, and other hand tools do break and wear out. They'll
be needed, quite probably, within the time span addressed by
other areas of Miles' site. Many essential tools will be broken
and need repair... probably more repairs will be needed than new
tools, though this will depend upon many issues as yet
unknown.
This is not to say that trade is the only reason to get into this
kind of work. Indeed, most farmers would still find basic
smithing skills useful, even in the age of electric arc welders.
I was able to persuade a modern dairy farmer to part with his
grandfather's forge only with great persistence and the promise
that I would see to any future blacksmithing needs he might have.
I've since straightened a wagon tongue and a steel lever, and
repaired "obsolete" farm machinery, among other things.
The three basic tools of the smith (hammer, forge and anvil) can
and must be supplemented by a whole bunch of other tools, but
every one of those tools from a drill bit to a rotary forge
blower can be made with the three basic ones. The most commonly
used hand tool in my shop is a two pound cross-peen hammer.
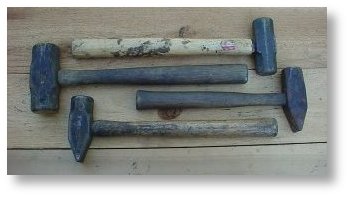 The two on the bottom in the illustration at left are
cross-peen hammers. The astute observer will note that one has a
longer handle on it. Both weigh the same, but the longer handle
gives the smith more leverage and allows for a more forceful hit.
I use this one for rough work like squaring round stock. The
shorter handled hammer is used for finishing points, bending, and
welding of light stock.
The two on the bottom in the illustration at left are
cross-peen hammers. The astute observer will note that one has a
longer handle on it. Both weigh the same, but the longer handle
gives the smith more leverage and allows for a more forceful hit.
I use this one for rough work like squaring round stock. The
shorter handled hammer is used for finishing points, bending, and
welding of light stock.
Most smiths use a heavier hammer than two pounds, but they are
usually in better shape than I, work with heavier iron, and have
a much larger anvil than I do. I sometimes use the 4 pounder for
heavier stock, but not often. I don’t think I would crack my
anvil face, but I don’t especially want to find out.
Almost any hammer will work for smithing... even that little 10
oz hammer your wife uses to hang pictures in the living room,
though to do any significant amount of work, you'd have to do
quite a bit of hammering with something that light. It is best to
get a hammer in the two to five pound range at a minimum for
general blacksmithing, but even better to have an assortment of
hammers in different weights and configurations. Brass, and lead
hammers do have their uses in blacksmithing, as do wooden
mallets, but in a pinch they can be done without. I find them
useful for adjusting work clamped to a drill press table and
straightening out bends that find their way into longitudinal
twists.
 An anvil, at least a quality anvil, is one of the more
difficult items to find these days. My own anvil, pictured at
left, is a relatively small and light model made in China and
sold at Fleet Farm (on clearance) more than twenty years ago. It
is a traditional one in that the body of the anvil is made of
wrought iron and the face of tool steel welded onto the body. It
has served me well for some twenty odd years and will likely last
another twenty. Unlike most modern anvils, my anvil rings just
like the old ones did. Modern anvils are almost all made of cast
steel, thus they do not ring. This is not as bad as some smiths
will tell you.
An anvil, at least a quality anvil, is one of the more
difficult items to find these days. My own anvil, pictured at
left, is a relatively small and light model made in China and
sold at Fleet Farm (on clearance) more than twenty years ago. It
is a traditional one in that the body of the anvil is made of
wrought iron and the face of tool steel welded onto the body. It
has served me well for some twenty odd years and will likely last
another twenty. Unlike most modern anvils, my anvil rings just
like the old ones did. Modern anvils are almost all made of cast
steel, thus they do not ring. This is not as bad as some smiths
will tell you.
The old London pattern anvil or slight variations thereof, is the
most common anvil in public perception. This is the anvil that
commonly gets dropped on the heads of cartoon characters from
great heights. It has a horn, a face, a pritchel hole, and a
hardy hole near the heal of the anvil.
A common variant is the farrier's anvil, which is generally
lighter in weight, and has a longer and more tapered horn. Other
designs may have two horns or other design variations. They can
weigh anywhere from a thousand pounds or more in the case of a
shop that does steam locomotive repair or traditional anchor
making, to a few ounces for a jeweler's anvil. If you can afford
to buy an anvil, get one that weighs at least 150 pounds or so...
heavier is better, but if you are trying to bug out of town with
your family in a '91 Ford Escort, a 500 pound anvil in the back
will almost certainly overload the suspension, not to mention the
back of the smith who has to lift it.
I have found that my 50 pounder is heavy enough for most small
household hardware like hooks, trivets, fireplace tools, etc. It
is also easy to move around my garage. Would I trade it for 150
pounder, though? Absolutely!
If you have to improvise an anvil, a section of railroad track
will work, as will a section of steel I-beam. Almost any kind of
heavy steel will work. Cast iron, like an engine block does not
make a very good anvil. Cast iron is brittle and will shatter
upon impact with a hammer. Probably the first anvil was simply a
large rock, and while a piece of granite is not my favorite
anvil, I have been able to use it for some purposes.
The anvil at right is made from a section of railroad track and
has served Miles for quite some time. An anvil like
this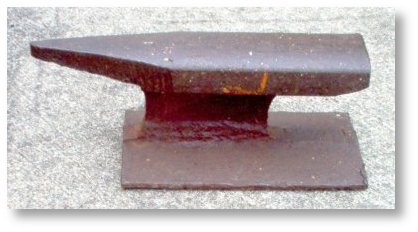 one does have limitations, especially when working with
very heavy stock, but you can use it for a surprising number of
things. Most common tool repairs can easily be handled with
this anvil.
one does have limitations, especially when working with
very heavy stock, but you can use it for a surprising number of
things. Most common tool repairs can easily be handled with
this anvil.
An important consideration with this type of anvil, or any light
weight anvil is the fact that it will soak up heat from the hot
iron being worked on its surface. When I am working with
any stock larger than half an inch in diameter, I generally put
my anvil in the slack tub for a few minutes after every two hours
or so. As a rule of thumb, if it becomes too hot to touch,
it is too hot!
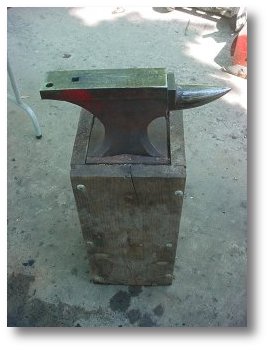
The anvil is mounted traditionally by spiking it to a heavy
wooden post sunk into the floor a fair distance with the face of
the anvil about knuckle-height to the smith. If you want it
lower, be my guest, I suspect that chiropractors will still be
plying their trade in the foreseeable future. I mount mine on a
box made of 2x12 stock held together with long carriage bolts and
filled with concrete capped by another piece of wood. This is a
fairly stable support and can be moved... with difficulty, as it
weighs more than the anvil.
Instead of being spiked, my anvil simply rests in a rectangular
recess sized to fit its base. This allows me to remove the anvil
and move it separate from the base. Other smiths use a steel
frame support and some chain the anvil down. This, they tell me,
keeps the anvil from ringing as loudly. To each their own.
You also need a forge.
The forge can be as simple as a fire built on the ground with a
"trench tuyer" and three "slaves" using their lungs and a long
tube each one in sequence to provide a forced draft as it was
done in times past. Now, slaves, by nature are not very good
workers, being unwilling ones... not that I blame them.
Volunteers fail as well, as they require food, shelter, and other
human needs just like the slaves do... but in a pinch, a group of
men with a good sense of rhythm can serve in this fashion for a
time. There are better ways, however.
The forced draft is essential. Naturally aspirated fires simply
do not provide enough heat to work iron and steel unless they are
quite large. This can be done, as, I have been told, the
traditional Japanese swordsmiths do, but a large fire consumes
proportionately large amounts of fuel and the immense heat from
such a fire makes it difficult to approach the iron being
worked.
Almost everyone even in these modern times is familiar with the
common fireplace bellows. This small bellows is called a
"single-acting" bellows, because it can only provide a forced
draft when being pumped in one direction.
The double-chambered or great bellows is similar in operation,
but it has two chambers and can provide a steady draft by virtue
of the design allowing for draft production while being pumped in
either direction. While a pair of single-acting bellows can be
used in tandem, a double-chambered bellows is preferred. The size
of the bellows depends upon the size of the forge, which in turn
is dependent upon the size of the metal to be worked.
Probably the best compromise package is either a modern or an
antique forge with a hand-cranked rotary “squirrel-cage” blower
to provide draft. The rotary blower was invented around 1850 and
has pretty much supplanted the bellows due in part to its compact
size relative to the bellows it replaced.
 My own forge is one of these. It was built by the Buffalo
Forge Company of Buffalo, NY, probably in the early 1900's. It is
made of heavy cast-iron and provides useful heat for most things
I need it for. I obtained it from a friend and when I picked it
up, the blower was froze up from rust and lack of use. Some of
the parts were bent from where it had been crushed against the
back wall of a shed by a trailer carelessly backed into it. I've
since restored it to working condition with minimal expense.
My own forge is one of these. It was built by the Buffalo
Forge Company of Buffalo, NY, probably in the early 1900's. It is
made of heavy cast-iron and provides useful heat for most things
I need it for. I obtained it from a friend and when I picked it
up, the blower was froze up from rust and lack of use. Some of
the parts were bent from where it had been crushed against the
back wall of a shed by a trailer carelessly backed into it. I've
since restored it to working condition with minimal expense.
This is what you want, if you can possibly find one. The modern
ones are available from several sources, and the old ones can
sometimes be found at farm auctions.
If you cannot locate or cannot afford a forge... all is not lost.
The first forges were made from scratch. Forges can be made from
masonry, or iron and steel. I've made forges constructed out of
brick held in a wooden box with a piece of black iron pipe as a
tuyer... the tube providing the draft to the fire. Never use
galvanized pipe for any forge part that will get hot... unless
you would like to experience lead poisoning first-hand. I've also
used brake drums for the "duck's nest". Brake drums work fairly
well, being made of cast iron. Anyone capable of performing basic
smithing operations should be well-able to engineer his own
forge... and there are numerous sources available for those not
able to design their own.
It is often helpful to have a "blacksmith's helper"... a support
that is the same height as the edge of the forge. It is
useful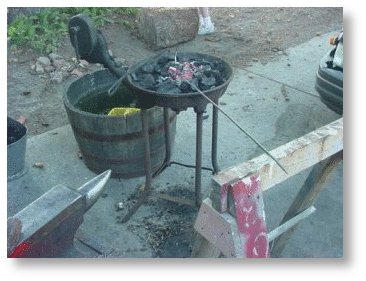 to have such a device adjustable to account for
variations in the level of the floor as well as the angle one
wishes the work to be held in the fire. At right can be
seen an improvised helper, a saw-horse. There are iron
helpers, but for light work, a wooden support is more than
sufficient.
to have such a device adjustable to account for
variations in the level of the floor as well as the angle one
wishes the work to be held in the fire. At right can be
seen an improvised helper, a saw-horse. There are iron
helpers, but for light work, a wooden support is more than
sufficient.
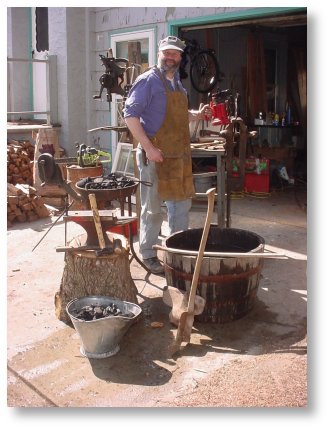
Another item that is needed is some kind of container for
quenching steel and supplying water for cokification of the coal,
or containing the fire in the case of a charcoal forge. This is
called the slack tub, and is essential. I use an old
whiskey barrel sawed in half, as can be seen in the photograph,
but any kind of bucket or tub will work so long as it is
water-tight and relatively heat resistant.
In addition to the slack tub, you also might want a container of
oil and/or brine. Not all steels can be effectively hardened in a
simple water bath. There are, for example, oil-hardening
steels. Caution: plastic buckets and the like do not
make good slack tubs, especially when containing oil. They
will melt and possibly cause a large oil spill in your
driveway.
A forge traditionally burns coal or charcoal, though they can be
designed to burn various petroleum products, alcohol, wood, coke,
natural gas, wood gas, and propane. If it will burn, you can
probably design a forge to burn it... though some fuels are more
preferred than others. Probably the most useful fuels for a
post-apocalyptic smith are the traditional ones; coal and
charcoal. Most of the others, natural gas, propane, etc. will not
be available in any reliable quantity.
Coal suitable for smithing is not at all easy to come by
commercially any longer. I used to buy it from a local coal
supplier, but now they only supply stoker coal, which is a
high-sulfur product in very large granulation. It can be used,
but it doesn't work well at all. Smithing coal can be ordered in
fifty pound bags, but be prepared to pay for shipping... coal is
heavy. Coke, which is what you convert the coal into when you
burn it in a forge, can be burned as well... if you can find it.
The best coal (or coke) for smithing has a very high percentage
of carbon, and a low percentage of sulfur and other
impurities.
The "shelf life" of coal, coke or charcoal is in the millions of
years... much longer than you need to store it, and it can be
stored out in the weather with no problems. Unless you live in an
area where you can "strip mine" it on your own land however, you
can't make it yourself, so get a few hundred pounds in storage
against the time when you can't order it any longer... more if
you plan to "hire out" your services to the neighbors.
"Shot coke" is a petroleum product, and does not work well for
smithing due to an extremely high sulfur content... take in a
lung full of the fumes from that stuff some day. After you have
finished your coughing spell, you'll understand with a great
wealth of detail why you don't want to use it if you can possibly
avoid it.
Charcoal is pretty much the antithesis of coal in many ways. It
is almost pure carbon, with no sulfur or anything else to make
the thick black smoke that characterizes a coal fire. It is
readily available at many distribution points. It can even be
made on-site if one has a ready supply of wood. It is relatively
light in weight. It is not without problems, however.
First, the forge must be designed with a much deeper bowl than a
coal forge in order to produce useful heat. A coal forge can burn
charcoal, but it must be modified a bit. When I burn charcoal in
my own forge, I generally stack a few rows of bricks around the
periphery to improvise a deeper bowl. Alternatively,
one can simply mound it up over the top of the fire.
The best charcoal is "natural lump" charcoal, which looks like
blackened tree branches, or in one case I saw, blackened hardwood
flooring scraps. Conventional charcoal briquettes intended for
outdoor cooking have some problems... the binder in this product
will break down if exposed to excessive moisture, and I have
heard that it will produce toxic fumes under a draft. I question
this claim, but I cannot refute it, so use charcoal briquettes
for smithing at your own risk.
Probably the biggest drawback for charcoal is that it burns up
much faster than coal does. A hundred pounds of coal will be
enough to supply my own forge for the entire Summer, a hundred
pounds of charcoal will be gone in a month or two.
Should you wish, you can make your own charcoal. Alex Bealer's
book contains some references to the subject as it was done
historically, and is done today. Not all that much has changed in
the basic process. Charcoalers build fires in piles of wood that
are partially buried in the earth. They open drafts up to let
varying amounts of air in to the fire from time to time until the
charcoal is done, and then they smother the fire. This is a very
simplistic version of what they actually do, however. Most of us
would not have need for such large amounts of charcoal as is
commonly made this way, however. Charcoal making is as much art
as science... kinda like blacksmithing... and those who make it
develop an expertise that is difficult to impart to others who
have not spent time in the woods sleeping under a tarp and
tending fires.
My neighbor Seffe tells me of long hard hours spent in making
charcoal under his father’s tutelage as a boy growing up in
Mexico. He also tells me that the pay for the finished product
was minimal at best. This is, unfortunately (or fortunately, if
one is buying rather than selling) common in the history of
charcoal making.
The basic process is simple; one burns wood under carefully
controlled conditions to burn off the wood gas and moisture among
other things, and leave behind the almost pure carbon that is
charcoal. Hardwood makes the best charcoal, but any wood can be
used.
Making small batches is labor-intensive, but not impossible to
accomplish. One way is to simply build a fire on the ground, wait
for the flames to die down, (an indication that most of the wood
gas has been burned off), and douse it with water. This will
leave charcoal in the ashes that can be gathered up and put to
use in a forge.
Another way that I have found effective is to build a fire in a
commonly available Weber charcoal grill with hardwood. Let the
fire get going pretty well and then put the lid on the grill and
close up the vents. The Weber design is almost perfect for small
scale charcoal production. It pretty much duplicates with modern
air vents and steel, what the traditional charcoal makers do with
dirt. Your first batch of charcoal will probably have quite a bit
of wood left in it. No problem, leave the wood for the next
batch... or simply use it as it is in the forge. You can convert
it to charcoal much as coal is coked in the forge, though you
probably do not want excessive amounts of wood in your forge. It
produces tars, creosote, smoke, etc. that are tough on the
smith's eyes, not to mention his lungs.
The first tool that a smith needs to construct, assuming he has a
hammer, working forge, and an anvil, is a pair of tongs. Tongs
are a tool used to handle small pieces of iron in the forge. In a
pinch, a pair of ViseGrips will work, though the short handles on
them limit their utility somewhat. A piece of iron can be worked
without tongs, provided it is long enough that the smith can hold
onto one end of it without burning himself when the other end is
at red heat. Eighteen to twenty-four inches or more is about
right. This should give you some idea of how long to make the
tongs.
My first and second sets of tongs are not pretty. They are crude
and ugly. I made them myself, though, and I still use them from
time to time. These days, though, I seldom admit to having made
something that ugly!
 If you wish, you can order tongs already made. This is
perhaps not a bad idea for the neophyte who is short of time...
which we all may be. However, making a pair of tongs is a good
exercise and by the time the apprentice has finished a pair of
tongs, he will have learned a good deal and will... perhaps... be
ready to tackle the project he made the tongs for in the first
place.
If you wish, you can order tongs already made. This is
perhaps not a bad idea for the neophyte who is short of time...
which we all may be. However, making a pair of tongs is a good
exercise and by the time the apprentice has finished a pair of
tongs, he will have learned a good deal and will... perhaps... be
ready to tackle the project he made the tongs for in the first
place.
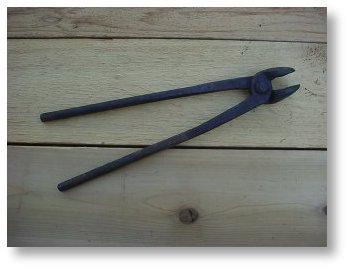
The tongs at left are horse shoe tongs... or that is my
belief. With so many tools, it is not at all uncommon to
find one in a shop that you never saw before. Most often
the smith who used the tool in question is long dead, so you
cannot ask him outside of consulting a medium... something I
definitely DO NOT recommend. These are used, as near as I
can tell, to handle horse shoes in a forge. The cupped jaws
allow for the cleats to be held firmly.
There are a plethora of other tools that can be either made or
ordered. None of them are essential, but all of them are useful.
They include hardies, specialized hammers, clamps, nail-headers,
vises, drills, punches, and so many others that I could not
possibly list them all here.
About vises.... a five dollar vise with a clamp to attaching it
to a work bench is unsuitable for blacksmithing. Your vise needs
to be large, heavy, and firmly fastened to a work bench. It it
can be swiveled in several dimensions, so much the better, but it
must be sturdy and able to take pounding as you may be using it
quite heavily.
Should you be so very fortunate as to find a leg vise... get down
on your knees and thank God profusely. I only recently acquired
one myself, and this after actively searching for twenty years.
Even if you find a damaged one that can be repaired... you have a
prize beyond price.
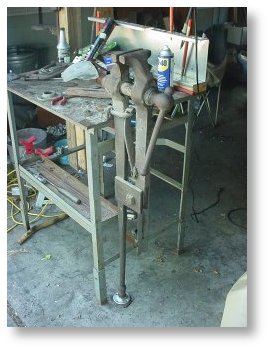 A leg vise has an extension on the stationary jaw
that goes to the floor, thus it is supported right from the floor
and is much sturdier than any bench mounted vise. When something
is clamped in this vise and is hammered on, the force of the
blows is not wasted on the flexing of the bench, it is rather,
applied to the work being hammered.
A leg vise has an extension on the stationary jaw
that goes to the floor, thus it is supported right from the floor
and is much sturdier than any bench mounted vise. When something
is clamped in this vise and is hammered on, the force of the
blows is not wasted on the flexing of the bench, it is rather,
applied to the work being hammered.
Traditionally, a leg vise's leg is set upon something like a
white oak post buried a fair distance into the ground, though
this is not my favorite. My own smithy needs to be portable, so I
prefer something on the order of a wedge plate or other support
base that can be picked up and moved along with the rest of the
shop. A plumbing flange and nipple of the appropriate size
makes a tolerable adjustable "foot" for the leg. A concrete
floor with a steel plate supporting the vise leg is pretty hard
to beat, but if you don't have concrete, improvise something
else... a large rock, a post, a steel plate, etc.
I got this vise (shown "as found" in the photo at right) from a
farmer's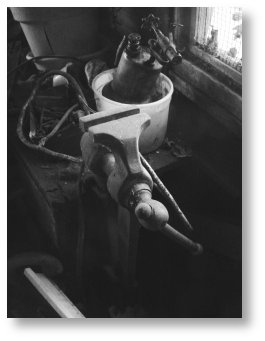 work bench in Abrams, WI. The present owner of
thefarm had little use for it after his father's death, so it
stood idle. When I came to remove the vise, it hadn't been
used in some twenty to thirty years, and neither had the
blowtorch in the ice cream bucket on the bench. The leg was
buried in the dirt floor with the rotted remains of a wooden post
under it.
work bench in Abrams, WI. The present owner of
thefarm had little use for it after his father's death, so it
stood idle. When I came to remove the vise, it hadn't been
used in some twenty to thirty years, and neither had the
blowtorch in the ice cream bucket on the bench. The leg was
buried in the dirt floor with the rotted remains of a wooden post
under it.
Most smiths buy some of their tools and make others. Necessity
being the mother of invention, smiths often make tools that they
will only use one time for some specific purpose. They do this
primarily because they can.
The one "tool" that a neophyte smith simply cannot do without is
a good set of books detailing smithing operations, properties of
metals, and any other subjects that might be thought useful.
Wainwrightry, harness making, and automobile mechanics come to
mind. Yes, smiths can repair automobiles... who do you think made
and repaired the first ones?
Two books I have found to be extremely informative are
The Complete Modern Blacksmith, by Alexander G. Weygers, and
The Art of Blacksmithing by Alex W. Bealer. Both have a
wealth of information in the form of prose as well as diagrams.
Remember, even if I manage to expand this article such that it
becomes more of an e-book than a web article, it won't be
available when the Internet is gone... unless somebody saves the
entire document and puts it out on a packet radio server.
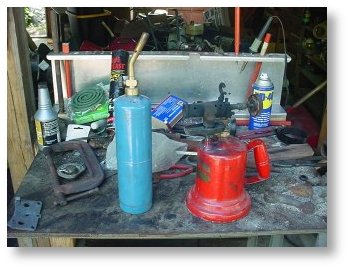 Another tool that can be useful is either a gasoline
or kerosene blow torch. It used to be a commonly available tool,
but today is found more often in antique shops, having been
replaced in the working world by propane torch. Both
the old and the new torches are shown at left. Please
excuse the workbench clutter.
Another tool that can be useful is either a gasoline
or kerosene blow torch. It used to be a commonly available tool,
but today is found more often in antique shops, having been
replaced in the working world by propane torch. Both
the old and the new torches are shown at left. Please
excuse the workbench clutter.
You might not be able to use it once the gasoline is gone, but
until that time, it will be quite useful for tempering steel
tools, soldering (you'll need an old-fashioned soldering iron
that has to be heated up by the torch), etc.. Be careful with
this tool... and make very certain it is in workable condition
before you do something as foolish as actually igniting it. NEVER
attempt to add pressure to a burning blow-torch. If the check
valve fails and sprays gasoline out through the pump stem... it
will ignite with no way to shut off the fuel supply. It is
difficult to get one to actually explode, but if it does, you
don't want to be near it. A good rule of thumb is to always have
a full bucket of water around to pour on the torch if
something... unexpected... should happen. I cannot stress enough
that these torches, while quite useful, are dangerous in the
extreme and as they are all fifty year old antiques now, may not
be in the safest condition.
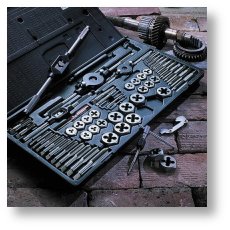 Get a good tap and die
set. The one shown at left is a high-end set by Sears
in their Craftsman line. They make several different sets
in different price ranges. This one contains a set of Easy
Outs. I have personally found Easy Outs to often be
ineffective in removing broken bolts, but the alternatives are
definitely to be avoided. Photo courtesy of Sears.
Get a good tap and die
set. The one shown at left is a high-end set by Sears
in their Craftsman line. They make several different sets
in different price ranges. This one contains a set of Easy
Outs. I have personally found Easy Outs to often be
ineffective in removing broken bolts, but the alternatives are
definitely to be avoided. Photo courtesy of Sears.
There will come a time when you will need to either tap a hole in
something or thread a rod for some reason. Trust me, you do not
want to attempt to cut threads by hand with a file. It can be
done, but is extremely time intensive and has a large scrap
ratio. Cutting internal threads by hand involves first making a
tap, which is done by first cutting threads on a rod of
annealed/normalized tool steel, then tapering the threads at the
end and cutting flutes into it. If this sounds impossible to you
it probably is, though it has been done. Making taps and dies is
not nearly so difficult if one has a properly equipped metal
lathe. More on this topic later.
By now you may have come up with another question; if I can't buy
a shovel at Fleet Farm, where can I order a half-ton of half-inch
square mild steel? The answer is, unfortunately, that a
post-apocalyptic smith may not be able to order anything.
Where, then, can he get metal to ply his trade with? Good
question! Probably the first thing any competent post-apocalyptic
smith would do is to secure a good supply of raw material, mostly
mild steel, but various types of tool steels might also be put
into "stock", as well as a few other metals, i.e.: brass for
brazing, lead and tin for soldering, maybe some copper tubing and
other materials. He might also procure for himself some old
recycled wrought iron or Swedish iron. Preferably, he'd do this
ahead of time, before the waste products hit the fan.
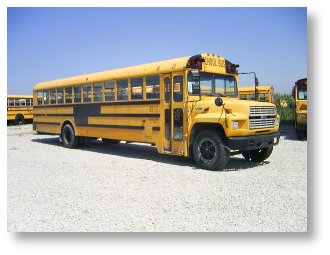 He'd load his stock, tools, forge, anvil, weapons, reloading
equipment, ammunition, food, water, other assorted supplies and
his family, carefully into an old school bus he bought and bug
out to parts unknown. (An old school bus makes a very good
bug-out vehicle because of its large cargo capacity, high
road-clearance, and the nearly bullet-proof sides). But suppose
he did not plan well enough and was caught unawares. (Remember,
not even Jesus knows the hour!) Photo courtesy of www.usedschoolbusses.com.
He'd load his stock, tools, forge, anvil, weapons, reloading
equipment, ammunition, food, water, other assorted supplies and
his family, carefully into an old school bus he bought and bug
out to parts unknown. (An old school bus makes a very good
bug-out vehicle because of its large cargo capacity, high
road-clearance, and the nearly bullet-proof sides). But suppose
he did not plan well enough and was caught unawares. (Remember,
not even Jesus knows the hour!) Photo courtesy of www.usedschoolbusses.com.
Well, look around you. There are all kinds of things in the
average garage or machine shed that won't have much use in a
post-apocalyptic world. A gas or electric lawn mower, for
example. The blade is high-carbon steel, suitable for making
knives, machetes, cleavers, hoes, mattocks, splitting froes, etc.
How 'bout that old side rake? Well, you might be able to use it
as is, but the rake tines are also high carbon steel that can be
used for many things.
The most useful source of base material however, may be that very
school bus that got you out to Gramma's farm in the first place.
(Trust me; at four to ten miles per gallon, you won't be driving
it around all that much after the original trip!) You can jack
the body up and remove the drive train, wheels and suspension.
Leave the body intact as it makes a very good instant shelter and
eventually a good place to store things that need to be out of
the weather. After you finish dismantling the drive train and
suspension, you will have hundreds of pounds of springs,
shafting, and nuts & bolts. Much of this will be good quality
high-carbon steel.
In a post-apocalyptic world, a common ordinary junk-yard is
considerably more valuable than a gold mine. You have at your
fingertips, an almost inexhaustible supply of various grades of
iron and steel bar stock. You have tons of sheet steel, which, as
any smith who has attempted to draw a bar down to a thin sheet
will tell you, is unbelievably precious. You have wire, and
generators, hundreds of radios that probably still work, gears
and transmissions, air-conditioning compressors, batteries...
that can be used as is or broken up for scrap lead which has a
whole 'nother application... as projectiles.
If you are a competent smith and wish to ply that trade in the
post-apocalyptic world, try to locate yourself near a country
junk yard. You will enrich yourself immeasurably not only for
your own projects, but if you can lay claim to that junk yard
somehow, you can supply other smiths with base materials as
well... in exchange for other goods and services, of course.
It is possible for a knowledgeable smith to make his own iron and
steel. This is not to be undertaken lightly, however. Alex Bealer
address this topic in the second chapter of his book. Depending
upon what exactly is wanted, different methods were and are
used.
One method of making wrought iron involves distributing small
pieces of cast iron in a furnace filled with charcoal. The
charcoal is then ignited and the fire fanned to a very high heat.
This will burn the extra carbon out of the cast iron and leave
pure iron and slag behind. This material will collect in the form
of a "bloom" in the bottom of the furnace, where it can be
dragged out and worked with hammers to form various sized rods of
wrought iron stock.
This will not be an easy task to accomplish, and anyone
attempting it should first consult a doctor to make certain of
his own sanity before proceeding. The final product of this
venture however may be well worth the effort.
Actual wrought iron is virtually unavailable today. It hasn't
been made in any form for quite some time, and after about 1900,
wrought iron bar stock was pretty much replaced by mild steel.
Most smiths hated the stuff, but short of making their own
wrought iron, a daunting task, they had to use mild steel where
they had used wrought iron. The advantages of wrought iron may
almost be worth the effort, however. It is far easier to weld
than any steel, one cannot burn it at any temperature... it will
melt first. It is much more resistant to rust than mild steel.
This is the stuff from which you want to make hooks that will be
used outdoors.
There are still a few sources for wrought iron. It is expensive,
but it might be worth stocking a few hundred pounds for certain
purposes... if one has the money. Swedish iron is very much like
wrought iron, but has less slag content and is more expensive.
It, too, is available in limited quantities.
Stainless steel is interesting material to work with. It cannot
be welded in a forge. It retains heat well and it can be used to
forge implements that are virtually indestructible as far as rust
is concerned. If you really try hard, you can get it to rust, but
it won't be an easy task. There are different grades of stainless
steel. The most rust resistant is not magnetic and is generally
softer. Surgical steels, some cookware, and other food grade
machinery is made of this stuff.
Other tools might be desirable. In the way of power tools, a
trip-hammer or power hammer will save many hours of hammering if
it can be adapted to wind, water, steam or other post-apocalyptic
power supply. Another machine that will be greatly useful is a
metal lathe... preferably a large one with as many accessories as
possible. Most of them will be electric, but there are ways to
supply limited electricity in a post-apocalyptic world.
 Traditional machines that are useful include treadle
grinding wheels and post drills, which are a kind of
old-fashioned drill press with a hand crank. Time was when every
farm in the country had both of these items in a shed somewhere
and often they can still be found there, covered with rust and
with wooden parts rotted to nothing.
Traditional machines that are useful include treadle
grinding wheels and post drills, which are a kind of
old-fashioned drill press with a hand crank. Time was when every
farm in the country had both of these items in a shed somewhere
and often they can still be found there, covered with rust and
with wooden parts rotted to nothing.
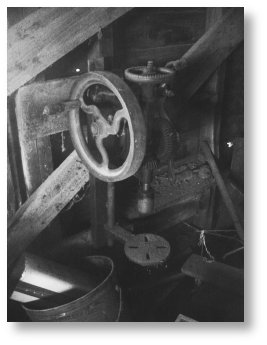
The post drill at right was missing a few parts, covered with
accumulated grime, and not very well mounted to the wall of this
work shop when I first laid eyes on it. I was able to place
it back into service with relatively little effort.
Currently it is "in trust" to me, pending its return to the
farmer who owns it. As he normally borrows my electric
drill press when he needs it, his post drill may be in my garage
for some time to come.
Keep your electric tools; drills, saws, grinders, etc. You can
still use them as I type this. I know this because I am using a
computer to type it on. For a while... possibly a long while...
electricity will continue to be available and electric tools are
of immense value in speeding the construction of a home, if one
needs to be built, a smithy, sheds, greenhouses, and other
structures and/or projects. There are also ways of producing
post-apocalyptic electricity for your power tools addressed in
other areas of Miles’ site.
I have made much mention and emphasis on post-apocalyptic issues
in this article. As I was writing this for Miles, I thought this
appropriate, but the principals can and perhaps should be applied
outside of a post-apocalyptic scenario as well. By definition,
the apocalypse is at a time no one knows. It will come as a
"thief in the night." How then can one prepare?
First, trust God. Second, don't worry. If you are able to get
prepared in time for the coming changes, so much the better. If
you get killed in the first nuclear exchange, you have nothing to
worry about anyway... not that it would do you any good at that
point.
Living "off the grid" is, in fact, its own reward. Slavery was
never actually abolished, you know. Only the form of it was
changed. We are all still slaves in many ways. We have to work
for a "master" in order to make money in order to pay for our
living expenses. We have to take rudeness, unpleasant working
conditions, and other nastiness as a matter of course. We never
seem to get out of the rut we have dug for ourselves. This is by
design... and started early in the last century. It is a
difficult cycle to break, but break it we can, if we really want
to.
The best way to cope with a post-apocalyptic world is to start
living in the way you would have to live then as soon as
possible. On the day the bombs fall, an Amish farmer will likely
look at the distant mushroom clouds, shrug his shoulders, perhaps
mutter "Gott in Himmel!", say a prayer, then urge the horse on to
the farm yard. He probably won't be milking cows much longer for
a living due to the changes in the economic system, but
otherwise, he has plenty of Kerosene and appliances that use
them. He won't miss the electricity as he doesn't use it, and he
won't care about the EMP that fried all the radio and television
stations. His life, and the lives of his family will probably go
on. He may have problems he might not otherwise have had, but the
basic living skills are already there and he is an expert.
We should all become experts... while there is still time, and
the best way is to simply go out and do it.
Chapter
II, Learning the Art
 K, so you've managed to beg, borrow, purchase or steal
(just an expression... you wanna try to steal my blacksmith
shop... by all means go ahead and try!) all the required tools to
set up a smithy. Congratulations, you're ready to become an
apprentice. An apprentice is one step above an idiot, and even
that only by virtue of the fact that he has decided he wants to
be a blacksmith.
K, so you've managed to beg, borrow, purchase or steal
(just an expression... you wanna try to steal my blacksmith
shop... by all means go ahead and try!) all the required tools to
set up a smithy. Congratulations, you're ready to become an
apprentice. An apprentice is one step above an idiot, and even
that only by virtue of the fact that he has decided he wants to
be a blacksmith.
The absolute best way to learn the smithing trade is to find a
Master Smith who is willing to undergo the many headaches
associated with training such an individual who wishes to
learn... or at least thinks he wishes to learn. Many modern
apprentices quickly discover that blacksmithing is not an easy
way to make a living, nor is it a simple task to learn. As an
apprentice, you will find yourself doing all sorts of things that
will make you think that the Master Smith training you is in fact
Satan himself... especially the first week. You will become
familiar with a great wealth of detail exactly what the phrase
"hands on training" means... and each one of your blisters will
remind you every day of that first week.
It might help to understand the Master Smith's reasoning. Most
Master Smiths have been at this for quite some time. They have
the muscles, the callouses, the scars, and, most importantly, the
experience to prove it. They've also trained, or attempted to
train a modern apprentice or two... often to their eventual
regret. If you want to be trained as a blacksmith... be prepared
to pay for the privilege. A Master Smith's time is valuable.
The smith will invest a good deal of time in training an
apprentice, much of this training is accomplished in that first
week. The apprentice will learn to build and tend a fire, the
names of tools... which he will be fetching constantly. He'll
learn the meaning of the phrase "black heat", at some point.
He'll also find out in that week of Hell whether or not he really
wants to be a blacksmith or not. The Master Smith will find this
out as well... and he normally has no patience for slow learners.
You will get yelled at as an apprentice. This is something most
modern schools do not teach their students, which is a sad thing.
You're an apprentice, so get used to it. Figure the first week is
one of testing... if you pass, great. You pass by not quitting.
Most young apprentices give up and quit. This is a sad commentary
on our youth, but it is often true nevertheless.
By the end of the first week, you will have learned a great
deal... but don't get cocky... you're still just a newly-trained
apprentice with excrement for brains, as far as the Master Smith
is concerned. Over the next few months and years... if you make
it through the first week... your knowledge and skill will
increase such that you may become a journeyman. The exact point
at which this occurs is difficult to determine. On the day that
the smith gives you some payment for your work, you have
officially become a journeyman. You can permit yourself exactly
one and one half seconds of pride in this... then get back to
work. Time is money... or what passes for money in the
post-apocalyptic world.
I have been doing this on and off for nigh onto twenty years. I
do not consider myself a Master Smith. In fact, I probably am not
much of a journeyman, in real terms. The gaps in my knowledge are
too great to be of any real use to a Master Smith other than as a
half-trained apprentice. I call myself a "shade tree blacksmith",
or "hobby smith". Even this is a bit pretentious of me.
 Most modern smiths will never achieve that exalted title of
"Master Smith", though quite a few will claim it. If you ever
reach a point where there is nothing else to learn, some
apprentice will teach you something new and you'll realize that
you really have not mastered your craft yet. When you have
reached a point where you know more than half of the things you
need to know as a blacksmith, perhaps then you can call yourself
a "Master Smith". It is always better to wait until another
Master Smith tells you this, though. He can see not only how much
you have learned, but also how much you have yet to learn and so
he is a better judge of your progression.
Most modern smiths will never achieve that exalted title of
"Master Smith", though quite a few will claim it. If you ever
reach a point where there is nothing else to learn, some
apprentice will teach you something new and you'll realize that
you really have not mastered your craft yet. When you have
reached a point where you know more than half of the things you
need to know as a blacksmith, perhaps then you can call yourself
a "Master Smith". It is always better to wait until another
Master Smith tells you this, though. He can see not only how much
you have learned, but also how much you have yet to learn and so
he is a better judge of your progression.
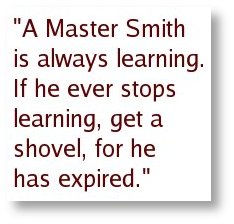
An important maxim: "A Master Smith is always learning... if he
ever stops learning, get a shovel, for he has expired."
There are a few schools that teach blacksmithing, though not as
many as there used to be. If you've got the time, the money, and
the inclination, go for it! Plan on learning much more than just
blacksmithing, however, and also plan on having gaps in your
education that a true apprenticeship would not leave you with.
You'll learn technical math, for example, but you probably won't
learn how to use a coal forge. You'll learn how to weld with
various types of electric and gas welders, but you may not learn
how to weld in a forge. Yes... you can weld iron and steel in a
traditional forge. How do you think welds were made before the
oxy-acetylene welding torch was invented?
The third way to learn blacksmithing is the least satisfactory,
but probably the most widely practiced these days. It is learning
by doing. This is the way I learned.
About twenty years ago, I ran across a book in the public library
called "The Art of
Blacksmithing", by Alex W. Bealer. I found it fascinating.
I read it cover to cover and renewed it for an extra month. My
first forge was an iron box that had previously been soldered
together and used metal window screen for a grate and an electric
hair-drier to provide draft. This did not work very well, as one
might imagine.
I built a second forge out of metal pipe, wood, and brick held up
on a metal frame. While more satisfactory than the first, it
still left much to be desired, and I built a progression of other
forges, each more or less superior to the previous model over the
next several years.
My first anvil was a section of railroad track, which worked
quite well, all things considered. My second was an actual London
pattern anvil, but it had been made of cast iron, and it broke
when I hammered on it. My third and final anvil is the one I use
now.
I made my first pair of tongs using some scrap iron I found in
the garage. They are not pretty, about what you'd expect from an
untrained apprentice, but I still have them today and I still use
them. After reading Alex's book, most of my learning came from my
own experimentation and from watching other smiths work. I am
still learning, and I hope I never stop learning.
If you find yourself in the final category of learning methods,
take heart, for you are in very good company indeed. The first
blacksmith did not have Alex's book. He did not have a steel
hammer, a forge, or a steel anvil. He learned much as you will,
by personal experimentation. We don't know that man's first
name.... but we know his last name; Smith, or Schmidt, or
Schmitt, or Smit, or any of a number of other variations
depending upon the nationality of the individual. Next time you
are introduced to a Mr. Smith, shake his hand with a bit of
pride, for you are meeting someone descended from a Very
Important Person.
Many a post-apocalyptic smith will quite probably fit into this
final category as well. Most probably he hasn't had the
opportunity to prepare himself for life in the post-apocalyptic
world... like many of the rest of us. He'll learn blacksmithing
because the blade on his hoe is worn out or broken, and he'll
probably ruin his first attempts to repair anything. If he is
persistent, he'll learn however.
Chapter
III, Basic Forging Operations
K, so now you have either completed some course of study
or read a few books on the subject. If you are very smart indeed,
you have now realized how much you have to learn and have either
abandoned all hope of ever joining the ranks of even the "shade
tree blacksmiths", or you think you are ready to start working
iron. If you are still reading this, perhaps you are in the final
group. If you are not very smart, continue to read as even you
may glean something from this... hey, even I learned how to do
it, nicht wahr?
The first thing you need to do is go out and get yourself some
moleskins, Bandaids, and tincture of iodine. Unless you are a
professional carpenter, mason, or other tradesman who works with
his hands, you are going to have blisters. It usually takes me a
couple of weeks in the Spring to develop callouses on my hands
such that I no longer get blisters from hammering. No pain, no
gain.
I have assumed that the reader has been able to obtain a forge
somehow. The ways and means of building forges is beyond the
scope of this article. Look in your blacksmithing books for
examples. There are many on line articles on the subject as
well.
Excuse me, I have to go and stir the beans for the chili. OK, I'm
back again.
Fire management is a basic skill acquired early by an apprentice
that does not enjoy getting yelled at constantly. You want the
forge fire to be centered over the grate so you start the fire by
packing coal around a four-by-four block placed over it. You pack
the coal, which should be wet and finely ground almost to a
powder, to a depth of six inches or so.
Start the fire with wood shavings and small pieces of wood in a
sort of tepee fire lay down in the hole formed by the
four-by-four, which should now be removed. Try to avoid using
Kerosene to start your forge fire... Kerosene will be sought
after in the post-apocalyptic world for other purposes, such as
lighting, heating, and cooking. Learn to start a fire with birch
bark, wood shavings, and pine sticks... known as tinder and
kindling. Popsicle sticks work great if you can get them. You can
use the ubiquitous Bic butane lighter for igniting your tinder,
but you will find that a wooden match works better, if you have a
good supply of them. They are cheap now, but they won't be when
the supply runs out, so stock up.
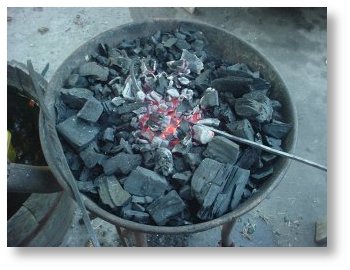
When the tinder catches fire, go ahead and start providing a
draft from the rotary blower, bellows, or whatever provides your
draft. This should be done very slowly at first and gradually
building up as the kindling starts. You then push the coal toward
the center of the forge and increase the draft. By now the fire
should be "roaring". It will produce quite a bit of black smoke
as the tar and other impurities are burned off leaving "coke",
which is almost pure carbon, behind. Coke is what you want to use
to heat your iron, and you will continually be producing it as
you work.
Within a few moments, your fire will be ready to work.
Probably the first basic smithing operation that everyone learns
is called "drawing out". No, this does not involve a pencil,
triangle and T-square, though the related field of mechanical
drawing would not be a bad sideline to have at your disposal.
Some day you might be called upon to make a steam engine from a
set of 1875 blueprints.
Drawing out is the process of forming work by hammering it on the
face of the anvil while it is at red heat, in a "plastic" state.
A length of iron bar stock is thus made longer and thinner by
this process. You heat a section of the bar and work it, flipping
it ninety degrees after a few blows have been landed, to repeat
the process again.
To sort of "get the hang of it", you might want to get yourself
some oil clay commonly available at any art supply store... or
any other fairly stiff putty-like material. Roll the clay out
into a long piece of round "stock" and let it cool for a while in
the refrigerator. Take it out and try to work it with a toy
plastic hammer. You can use your regular anvil, or the kitchen
table, if the female half of the household will allow it. This
will give you a rough idea of how iron behaves in a plastic state
without burning any coal.
When you flip the work, allow your hammer to fall to the anvil
surface and rebound for one stroke. Don't actually apply any
force to the blow, just let it fall from its own weight. This
allows your arm to get a short rest and also helps to remove the
scale, that dark material that flakes off the hot iron as you
hammer it. It also causes the anvil to ring. Take your choice of
the reasons to hit the anvil while the work is being flipped. Any
one of them is just OK... and all smiths do this for one reason
or another... the reason varying with the smith.
A good first project for a new smith is a "rake". A rake is a
tool used by the blacksmith, or quite likely the apprentice, to
move lumps of coal, or other objects around in the forge. It is a
rod of metal with a short flattened bend on the working end, and
an elongated loop on the handle end. It needs to be long enough
so that you can handle it without burning yourself on it. About
24 inches length overall is about right. Some smiths actually use
something more akin to a garden rake with small tines, but I have
found my simple rake to be quite sufficient.
The use of this tool gave rise to the phrase "raking over the
coals", meaning to make someone uncomfortable.
Another good project is a fireplace poker... which can double as
the forge rake, for those short of iron stock.
You'll note that the finished work will be black in color. This
is where the term "blacksmith" comes from. Iron as it was
traditionally worked, was called "the black metal". "Smith" comes
from the verb "smite", as in to smite the black metal. Hence:
blacksmith.
Another catch phrase even in modern culture is "to strike while
the iron is hot", meaning to take advantage of a transient
condition of opportunity. Iron is normally worked at "red heat".
So... what does that mean exactly?
Well, in theory, Iron can be worked at any temperature, and in
some applications, medieval armor, for example, is worked cold.
There are problems with cold working bar stock however. First and
foremost, you will quickly run out of energy trying to forge cold
bar stock. Second, if you do manage to work it while cold, you
will end up with a piece of iron that is so work hardened and
loaded with internal stresses, that it will likely break at the
first application you put it to. This is especially important
when forging something like a sword or other knife blade.
So strike while the iron is hot. It may have occurred to you by
now that you have to work quickly. If it has, you are correct in
your presumption.
Heat is traditionally gaged by color, and the proper forging heat
will vary with the type of material being worked. Most mild
steel, used for 90% of the work most smiths do, works best at a
bright yellow-orange to a red-orange color. When it gets to a
dull red color, it has cooled too much and must be reheated for
further working. Forging temperature is not nearly as critical as
that of welding or hardening and tempering. If you get it so hot,
that sparks fly out of the forge, you have gotten it too hot.
This is what is termed "white heat", and is the temperature used
for welding. You can burn your work like this and if you do, you
will have to discard that piece of metal and start over. The
smaller the work becomes, the more critical this is because
smaller work heats up much faster.
A word about "black heat". Recently forged iron holds its
temperature for quite a while after it is taken out of the fire.
One will obviously be careful about picking up a piece of work
that is still glowing red, but an inexperienced individual might
simply grab onto a piece of black iron laying on the anvil. That
piece of iron can be hot enough to make a piece of wood burst
into flame. Think what it could do to your hand. Good rule of
thumb: when you are visiting another smith's shop, don't touch
anything unless he hands it to you... if it didn't burn his
hands, it won't burn yours either.
An experienced smith upon reaching for a piece of iron for which
he is unsure of the temperature, will invariably hold his hand
over it first to see if he can feel any heat, then he will touch
it quickly and pull his hand away... perhaps a few times...
before picking it up. If the iron is very hot, it will sear the
nerve endings so fast that there is no time for the pain to get
to the brain. The nerve endings a little further up the network
will fire before they die though... but not fast enough to keep
you from blistering your hand. If you are fortunate, your skin
and the flesh beneath will not stick to the metal when you scream
and pull your hand away.
Iron works HOT. Never forget that.
You'll gradually lengthen and thin the bar to the required
specifications and end (hopefully) with a square piece of bar
stock that has some hammer texture, a black surface, and is the
proper length for the required usage. Try to avoid getting it
into a trapezoidal shape... unless you are actually trying to do
that. Hint: if you end up with a trapezoidal cross section...
claim you wanted it that way! Once a bar has gotten started in a
trapezoidal shape, it requires a good deal of effort to correct.
Keep your blows square to each other.
 A point is formed by gradually tapering the work down. You
can make it as gradual or as abrupt as you wish. I start tapering
my storage hooks about three inches from the end and bring 'em to
a fairly sharp point. This is not necessary, and it may be
desirable to avoid sharp hooks, especially when they are destined
to be placed where someone might injure himself on it. Hint:
don't hang wall hooks at eye level if it can be avoided.
A point is formed by gradually tapering the work down. You
can make it as gradual or as abrupt as you wish. I start tapering
my storage hooks about three inches from the end and bring 'em to
a fairly sharp point. This is not necessary, and it may be
desirable to avoid sharp hooks, especially when they are destined
to be placed where someone might injure himself on it. Hint:
don't hang wall hooks at eye level if it can be avoided.
Bending can be accomplished in any one of several ways. It seems
fairly straight-forward, but it can be the most frustrating
experience a new smith can have, perhaps because it seems so
simple. That pointed end of the anvil is called the "horn", and
one of the primary uses it has is for bending the iron being
worked. It can be used with light blows close to the pivot point
to make for a gradual curve, or further from the pivot point to
produce a more abrupt bend. Bending on the horn is not as easy as
one might think. I will just about guarantee that your first bend
will be misaligned. Don't panic, you can flatten it out on the
anvil's face to correct your mistake.
The elongated loop for the handle of your rake is normally forged
on the horn. Figure that you need about two inches more than the
length of the loop you plan to make. Measure that distance...
about a hand's breadth... from the end and add three inches for
the bend and mark it with a piece of soapstone. Heat the area
just beyond the mark and then make your bend either over the horn
or by simply bending it with tongs. You can either make a
teardrop shaped loop or a "square handle". If you wish to do the
teardrop handle, you need to put a scarf on the end of the rod
before you make the U bend. If you want a square handle, just
bend the rod until it becomes parallel to itself and then heat
the end of it and bend the rod until it touches itself. You can
weld this joint... and it is fairly easy to do if you have a
teardrop shape and have properly scarfed the end of the rod. This
is not necessary, however.
At this point, you should have a fairly usable rake and are ready
to move on to other things.
What other things? The sky is the limit!
Drawing out is probably the most common forging operation, but it
is not the only one. A second operation is called "upsetting".
While drawing out thins and lengthens the work stock, upsetting
does the opposite; it shortens and thickens the stock.
There are various techniques for upsetting. One of the most
interesting is to simply heat the end of the rod you want to
upset and then drop it onto a hard surface such that it hits
longitudinally. The momentum of the rod itself supplies the force
of the blow. This can be repeated as many times as necessary to
achieve the desired thickness. This method is rather difficult to
control however. You will often find that the work will bend as
well as being upset.
Other methods involve hammering on the heated end of the
workpiece to facilitate upsetting, and bracing the heated end
against the anvil face and hammering the other end. These both
work to some extent, but also suffer from a tendency to bend the
work.
The Complete Modern
Blacksmith has an excellent section on upsetting. There
are techniques there for correcting the above mentioned bends.
The use of an upsetting matrix, also shown in this book, greatly
reduces the tendency to bend the work while upsetting.
Why would you want to upset a piece of work in the first place?
Well, for things like wall hooks, as I make them, you wouldn't.
Likewise for many other implements. But suppose you wanted to
make a bolt with a head on it? I suppose that you could forge the
shaft and the head separately, but handling such a small piece as
a bolt head... and especially at welding heat, is almost an
exercise in frustration. Even if you somehow manage it as a new
smith, quite possibly the weld will be imperfect and will break
when torque is applied to it. Much better to upset the head from
the shaft in an upsetting matrix and then refine the shoulder
with a header plate. Once this is accomplished, one can forge the
square or hexagonal bolt head. I would highly suggest the square
bolt head for beginners... they are much easier to do. Carriage
bolts are made similarly, but with a square-holed header
plate.
Fullering is a specialized form of drawing out. It involves the
use of a tool that looks like a chisel with a rounded over
working surface. To use it, one simply places the working surface
over the workpiece and hammers it into the metal. This will make
a (hopefully) shallow impression on the work, thinning it and
lengthening it, but not appreciably increasing the width. This is
repeated for the entire length of the workpiece. The finishing
operation involves forging the high spots down to the level of
the impression, thus forming... perhaps... a blank for a knife
blade or similar implement. Fullering can also be done with the
peen of a hammer... so long as it is not too sharp. Another type
of fuller fits into the hardy hole of the anvil and the metal is
placed on top of it and struck with the hammer.
I have never found fullering to be all that useful... but then, I
don't normally make knives from round or square bar stock. Still,
it is an available technique.
Twists are formed by holding one end of a workpiece that has been
heated and twisting the other end of it. You either need an
apprentice, or you need to get creative. If the implement to have
the twist applied to it has a bend in it as a forge rake or wall
hook, one can put the bend into the pritchel hole or hardy hole
of the anvil and twist the other end. If it does not have such a
bend, you need something like a vise to hold it.
 I have a metal work table (rummage sale $5.00) that
has a few holes drilled in it that I sometimes use for twisting.
This method has the advantage of having the relatively true work
surface to use as a gage to avoid unwanted bends in the section
getting the twist as I can keep the workpiece relatively parallel
to the table top. You also may need some kind of gripping tool to
apply twists for some applications. Tongs will work, but I have a
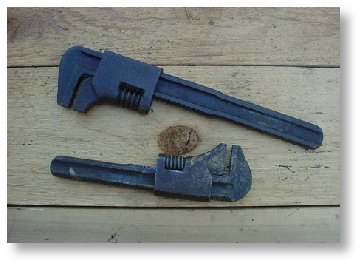
couple of old-fashioned monkey-wrenches (photo at left) that work
quite well for this. The jaws can be adjusted to fit the metal
and then used without fear of having the work twist out of the
grip. I've seen one of these wrenches with another piece of metal
welded onto it to form an adjustable "T" handle. I haven't tried
that yet, but it should work rather well as you would have more
control over the workpiece, not to mention added leverage.
I have a metal work table (rummage sale $5.00) that
has a few holes drilled in it that I sometimes use for twisting.
This method has the advantage of having the relatively true work
surface to use as a gage to avoid unwanted bends in the section
getting the twist as I can keep the workpiece relatively parallel
to the table top. You also may need some kind of gripping tool to
apply twists for some applications. Tongs will work, but I have a
couple of old-fashioned monkey-wrenches (photo at left) that work
quite well for this. The jaws can be adjusted to fit the metal
and then used without fear of having the work twist out of the
grip. I've seen one of these wrenches with another piece of metal
welded onto it to form an adjustable "T" handle. I haven't tried
that yet, but it should work rather well as you would have more
control over the workpiece, not to mention added leverage.
Bends will sometimes manifest themselves in a twist. They can be
dealt with. You can't really correct them very well on an anvil
with a hammer in the way you would a bend developed while drawing
out as you will cause flats to form on the twisted section. I
usually correct them by laying a small piece of plywood on the
anvil and then using a brass hammer to correct the bend against
the plywood. The plywood will burn, but it and the brass hammer
are usually soft enough to avoid flats and hard enough to allow
for the bend correction. Another technique I have found useful is
a wooden mallet and a large section of a tree trunk or stump.
This makes for much smoke, but never produces any flats on the
twist. It also does not leave any brass residue on the
work.
I have placed a short Windows Media clip here that demonstrates a few
techniques. Video quality could be better, but it does
serve to show drawing out, twisting, and correcting a bend in a
twist.
Most twists, such as those put in a fireplace poker's handle, are
purely decorative. Whether or not the post-apocalyptic smith
would utilize his limited resources of time and coal to produce
such things would depend upon circumstances. I suspect that most
smiths would still do some decorative work on their products...
decorative work tends to fetch a higher price in the market
place.
Market considerations will still be important in the
post-apocalyptic world... though the relative values of things
will likely be skewed from where they are now. In some places a
bride's dowry is still commonly paid to the new husband by the
bride's family. In the post-apocalyptic world, surviving women
may be a bit scarce... conditions being harsh. If you want a
healthy young wife, for example, (this is assuming, of course,
that you are not an ornery old man such as myself, but rather a
youngster intent on starting a family) you may end up having to
pay her father. It is easier to make twenty decorative pieces
than it is to make forty plain ones in exchange for the hand of
the same woman. If she is beautiful and/or exotic, you might have
to pay even more, further enhancing the added value of your
labor.
My solution would be to court her older sister, who might not be
as pretty, but probably is smarter and possibly not as flaky...
and maybe only have to produce ten decorative items. If she is a
widow with kids (a definite possibility in this kind of world),
so much the better! Older children are infinitely useful around a
smithy!
Some twists are not decorative, however, but are actually one of
the basic simple machines known as the screw. Certainly you can
make lag bolts and wood screws by twisting appropriately shaped
bits of metal. You might also find yourself needing to make a
drill bit for your post drill, or even a brace bit for the local
carpenter's brace.
Twists for drill bits need to be more true than a decorative
twist. You need some kind of guide. A piece of half-inch pipe the
appropriate length will provide a good guide for twisting a metal
strap sized a little smaller than the inside diameter of the
pipe. You would then insert the workpiece and twist it the
appropriate number of times. For a six-inch bit, you will
probably twist it six times. Drill bits do wear out. They also
break. You will have to replace them somehow. Start with
decorative twists... the techniques are similar.
Metal can be cut by various methods. You can use a chisel, a
hardy, a bar-cutter, a hack-saw, a set of bolt cutters, or even a
hand ax. If at all possible, get yourself some bolt-cutters
and/or a stock cutter before the bombs fall. These items are
infinitely useful and save an unbelievable amount of labor and
coal.
A hardy is one of a variety of anvil tools that fits into the
hardy hole (catchy name, nicht wahr?). It is a sort of inverted
chisel that sits fixed in the anvil. One uses it by placing a
heated workpiece over it and striking it lightly with the hammer.
You do this, typically four times, rotating the workpiece 90
degrees between blows and finish it off by breaking the almost
cut through bar with your tongs. If you have a good sturdy hardy,
you can do this cold, but it is quite a bit of work and wears out
the hardy.
Using a hardy to cut bar stock takes a bit of practice. If you
hit too hard, you may cut through in one stroke and impact the
hardy with your hammer face possibly marring both the hardy and
the hammer face. A brass hammer is a good tool to use when
cutting small stock on a hardy.
A chisel is used in pretty much the same way, excepting that it
is held above the work and struck directly with the hammer. This
is done on the edge of the anvil over the area known as the
"table", just forward of the edge of the face before the horn.
This area is softer than the face. In modern times with anvils
scarce and expensive, one normally covers the table with a
thickness of soft metal, aluminum, brass, or soft iron. This
avoids marring the surface. Never try this directly over the face
of the anvil. This is a hardened work surface and will damage
your chisel... if you are fortunate. If you are not so fortunate,
your chisel will damage your anvil face. Its kind of an
irresistible force vs. immovable object kind of dilemma.
Another kind of chisel-like implement is called a “hot set”. A
hot set is a chisel or punch that has a perpendicular handle on
it. This allows one to keep one's hand clear of the hot
metal.
All in all, a hardy is superior to any chisel or hot set for most
applications involving heated metal. Cold chisels are often
useful for some tasks where it would not be convenient to heat
the work being cut. Typically this will be when it is
necessary to remove a bolt from a piece of antique farm machinery
and the nut is rusted tight and rounded over. Chiseling it
off may be the only alternative if your acetylene torch is out of
fuel.
To avoid all the extra effort, expenses, and risks associated
with the use of hardies and chisels for cutting metal, use your
bar-cutter or bolt-cutters. Learn to use the hardy, however; one
of these days somebody may steal your bolt-cutters and you'll
have to go back to the old ways... unless you really want to
start using a hack saw.
These constitute most of the common methods of forging iron and
steel. There are others, however, they are pretty much just
variations of the above operations. If you master the above
techniques, you will be well on your way to becoming a
fair-to-middlin' post-apocalyptic smith. There are more things to
learn however, so after you feed the rabbits or the goats, finish
driving the sand point, dig the latrine pit, and shoot the weasel
that's been pestering the chickens, come on back and read on.
Chapter
IV, Welding, Brazing and Soldering
 ll smiths eventually have to weld something... and most of
us do not especially enjoy the experience. It requires
exceptional skill, good quality coal or charcoal, and often no
small measure of Divine assistance. Call it luck if you wish... I
don't believe in luck. If you get a good weld the first time you
attempt it, God was standing over you supervising your work.
There is simply no other explanation... it is that
improbable.
ll smiths eventually have to weld something... and most of
us do not especially enjoy the experience. It requires
exceptional skill, good quality coal or charcoal, and often no
small measure of Divine assistance. Call it luck if you wish... I
don't believe in luck. If you get a good weld the first time you
attempt it, God was standing over you supervising your work.
There is simply no other explanation... it is that
improbable.
I will not address welding with modern apparatus like
oxy-acetylene, electric arc, etc. I do not know the first thing
about these techniques... don't even know how to light a torch.
If you own one of these things, good for you, you probably have
taken a course somewhere on modern welding. If you haven't ...
you'd be well advised to do so before you kill yourself and a few
by-standers.
In any case, the supply of pressurized oxygen and acetylene will
be sharply curtailed in the event of a major disaster. If
you have such a torch, lay in some supplies if you intend to use
it. Don't waste money on an electric arc welder in
preparation for a disaster. They require a fairly high tech
base to remain usable. Welding rods and high voltage
electricity are going to be in short supply.
In times past, there were welding apparatuses (apparatii?) that
utilized calcium carbide and water to produce a chemical reaction
that liberated acetylene gas. If you can get one of those
units in working condition, grab it, but not if you don't know
how to use it. Acetylene gas can still be made with the
same calcium carbide/water reaction. Oxygen can be made
through electrolysis of water. If a method can be devised
for getting the gases into your welding tanks, oxy-acetylene
welding could still be a viable welding technique in the
post-apocalyptic world. This will not be easy, however, and
if you do not know how to facilitate this kind of production and
storage, do not attempt it. The production of oxygen and
acetylene, not to mention hydrogen as a by product, is extremely
dangerous as all these gases are explosive.
Forge-welding is a process as old as blacksmithing. Indeed,
traditional wrought iron has been "folded" several times before
it ever gets to the smithy. The word "wrought" means "worked",
and making it involves a good deal of work... much of which is
welding. Folding, that type of welding used in the manufacture of
wrought iron is just exactly that; one folds the metal being
welded in half, heats it to welding heat and forges it into one
solid mass.
This is not as simple as it sounds, however. Traditional wrought
iron is the easiest by far to weld as the danger of burning the
metal is all but eliminated. It welds so easily that a flux is
often not needed. Wrought iron, though, is probably not the
material the post-apocalyptic smith will be working with.
The simplest weld to make is a common lap weld, and the simplest
variation is one in which the piece to be welded is a ring or
chain link. The reason that this is fairly simple is that both
ends of the weld are composed of the same material as they are in
fact two ends of the same piece of metal. Thus the welding
temperature will be the same. It is much more difficult to weld
two different types of steel together because they have to be
heated to different temperatures simultaneously. This is often
not as critical as it might be thought, however.
To begin, take a piece of bar stock, draw it out to the required
thickness and length and then put a "scarf" on each end. This is
a tapered section. Make one scarf "up" and one "down" such that
they will fit together. Forge the link so that the two scarfs are
almost touching and then dip the area to be welded into the
flux.
Flux is something to keep oxygen and other impurities away from
the metal surfaces to be joined. Various substances have been
used. Japanese sword smiths used a flux made from charcoal ashes,
others have used sand, ground glass, iron filings, and other
things. Often smiths are a bit secretive about what they use as a
flux. I am not, I use borax. You can get borax from chemical
supply companies and possibly at a welding supply store... but I
just use the familiar Twenty Mule-Team Borax available as a
product to wash clothes with. You can get it in pretty much any
grocery store. Again, Borax will not be available in a
post-apocalyptic world. Stock up now and keep it someplace dry.
It has a long shelf life.
Once the scarfed joints have been well-coated with flux, get your
rake and rake out the clinkers from your fire. Clinkers are
impurities that are within the coal and collect at the grate in
the bottom of your forge. They are multi-colored and when they
fall to the floor, they make a metallic "clink" sound... hence
"clinkers". If you do not do this, you will not be able to make a
successful weld in that fire. If you are using charcoal, don't
worry about clinkers, they don't exist.
It's an old joke for a smith visiting another smith's forge to
drop a bit of copper down into the forge when the "home" smith is
not looking. Until the bit of copper has been found and removed,
that smith will not be able to make successful welds. This is not
funny. It wastes resources, time, and effort that will all be in
short supply in the post apocalyptic world. A smith who plays
this trick on another smith owes him a day's labor and/or the use
of his wife for a period of time to be negotiated between the
victim of the prank and the wife in question. If she decides that
she likes the new smith better, she may stay... at her option,
not her husband's. In other words... don't play this kind of
trick unless you are willing to assume the risk of the
consequences. There most assuredly will be consequences.
Rake the coals back into the center, place the workpiece back
into the fire, way down deep where the fire is the hottest and
start fanning the fire. Judging welding temperature requires
experience, and you will probably burn some iron before you have
gotten the hang of it. Welding heat is described as "white heat",
though this is a misnomer.
First of all, welding heat will vary with the composition of the
steel. Generally, high carbon steels will weld at a lower
temperature than mild steels, and if you heat it too hot, it will
burn. This is most critical with small workpieces... or thin
ones. Knife blades forged of folded stock are extremely difficult
to make if you actually have to do the folding.
Also, "white heat" really isn't white. It is, at best, an off
white color, more yellowish. White heat as applied to forging
operations is about the color of a "cold blast" lantern flame. A
Dietz Blizzard and Little Wizard are both examples of cold blast
lanterns. This is the proper color/temperature to weld most mild
steels, Swedish iron and wrought iron. High carbon steels such as
are used in the manufacture of automobile springs generally weld
at a yellowish temperature. Take a look at a "hot blast" lantern
flame for a fairly close example of this color. A Dietz Monarch
is an example of a hot blast lantern.
Be careful not to burn the work.
When in doubt as to welding temperature, take a thin rod... say
1/8th inch or so in diameter and slowly push it down to the piece
being welded. If it sticks to the workpiece, you have reached
welding temperature. If you are welding a large piece, you need
not work especially fast as a large workpiece holds its
temperature fairly well... a small piece needs to be welded quite
quickly.
Be careful not to burn the work.
Judging temperature by color is almost a lost art. It is easier
to do in a dark area, which is one of the reasons that smithies
tend to be dark and gloomy places. If you are forging out of
doors, which you may be doing at least initially, a hood for the
forge helps quite a bit. All rivet forges had hoods, but many
forges commonly used on farms did not have them. Hoods are made
of sheet metal, have a large opening for fire tending and placing
work inside, and are tapered to form a short smoke stack. If you
are indoors, this stack needs to go to a chimney... though if
indoors, you probably don't need the hood in the first place,
just good ventilation.
The obvious fire hazard in using a forge indoors cannot be
overstated, and if your neighbors see smoke coming from the eaves
of your garage, they will call the fire department. I know this
from experience. The fire chief who responded was very polite,
but he was not amused.
When your workpiece has reached welding heat, take it out of the
forge quickly and hit it with the hammer. This blow must be
quick, hard, and accurate. It needs to both spray the flux out of
the joint and join the molten metal together in one or at very
most two or three blows. Hammer it together and examine it.
Hopefully the lap will be aligned properly. If it has been
misaligned, you can try to dress it by forging it on the horn or
the face of the anvil... after it has cooled to red heat. If the
weld holds under this kind of stress, it will hold whatever
stress you are making it to withstand... if it does not hold up,
it was never welded in the first place and you must start
over.
Be careful not to burn the work.
Should you have need to weld two separate pieces into one piece,
you will have need of either a hold-down of some kind, or a
well-trained apprentice. This most difficult of tasks is
something I have never managed... though I only attempted it one
time. Even more difficult is trying to weld, say a high carbon
steel blade onto the edge of an ax head. This is seldom done
these days as we have good quality high carbon steel available in
quantity at affordable prices. Today one would make the entire ax
head out of high carbon steel and not just the edge. In times
past it was common to weld blades into ax heads, hammer faces
onto hammer heads, and even high carbon edges onto scissors and
shears.
Pray to God you never have to do this kind of work! The technique
involves placing both items into the forge in such a way as both
reach their respective welding temperatures at the same time.
When this happens, you have to lay the blade into the scarf made
for it and quickly weld it into place. It can be done, and has
been done, but the men who can do it are truly Master Smiths
indeed.
Forge (or "pressure") welding is not without difficulties and
risks. Risks of fire and injury can be minimized by making
sure that all flammable material and all personnel are far enough
away from the smith to avoid the molten metal and flux that will
be violently expelled in the welding process. Take this
seriously. Medical help will be in short supply, so avoid
risk of injury whenever possible.
Welding is a type of cohesion, and is especially strong. Less
strong, though somewhat easier to do are brazing and soldering.
Both of these methods of joining metal are classed as adhesion.
As such, they are not as strong as welding.
Brazing involves heating the steel to the proper temperature and
then joining two pieces together with melted, or initially
powdered, brass. Brazing requires a fairly high temperature, but
not as high as is required for welding. It is done in the forge.
If something needs to be brazed... normally this will be some
item made of cast iron which cannot be welded... it is best to
use modern methods if at all possible. Forge brazing is chancy at
best, and unless the item being repaired is small, say fixing a
broken handle on a Lodge 6 1/2" skillet, your chances of success
will be limited.
To braze, you must first clean both surfaces to be joined. You
can do this with a common wire brush. Next, heat both surfaces,
apply flux and some brass filings (spelter), and after placing
the workpieces to be joined in the forge, heat until the brass
melts. Then tap the end of the smaller of the two pieces such
that the melted brass on both pieces is joined together.
Obviously, both pieces must be carefully supported such that they
align well. Once they are joined together, let the fire die down
so that the brass will harden and (hopefully) the two pieces will
be joined together.
In times past it was (allegedly) fairly common to braze items
like broken saw blades, due to the difficulty in welding such
thin metal. I have never met a smith who could demonstrate this
to my satisfaction with traditional methods.
Soldering is fairly simple and straightforward. First, as with
brazing, you must make certain the surfaces to be joined are
clean. You melt a lead alloy and use it to stick two pieces of
metal together. Steel can be soldered, but it is difficult to do
properly, and even when done properly is not very strong. When
steel is soldered, it is normally thin sheet steel. The metal
traditionally joined in this manner is copper, though brass will
also submit well to soldering.
Aluminum cannot be soldered or brazed... it must be welded, and a
blacksmith cannot weld aluminum with traditional methods. It can
be cast, though my only attempt at casting aluminum... didn't
work out too well. Never attempt to heat magnesium. It looks like
aluminum, but is stronger and lighter. It also burns with a fire
that cannot be extinguished. If the “aluminum” you are trying to
melt in a crucible catches fire, take it out of the forge and get
away from it until it burns out. It wasn't aluminum.
By traditional methods, one would heat an old-fashioned soldering
iron up either in a forge or with a blow torch, and use it to
heat the items being joined and the solder. You can apply the
torch flames directly to the material being joined, and you may
have to if you are joining items that are large... like sections
of a copper roof being repaired in cold weather (be careful not
to burn the wood underneath the copper). You would also use
solder to fit copper pipe and tubing together. Silver solder is
the stuff to use these days, as there are laws forbidding the use
of lead solder for this purpose.
Soldering also takes much skill and practice and is not really
the bailiwick of the blacksmith, though he should be at least
somewhat familiar with the process. A post-apocalyptic smith
might be called upon to repair nearly anything, and a short-wave
vacuum tube radio cannot be repaired with a forge and a
hammer.
Metal can also be joined by other methods. Mechanical fastening,
is probably the oldest method, next to welding. Riveting and/or
bradding are both methods of mechanical fastening. One does this
by placing rivets or brads through holes in both pieces to be
joined and rounding over the end or ends. Only the rivet needs to
be heated... and even this is not an absolute requirement. If the
rivet is soft enough and small enough to be worked cold, one can
mushroom the end with no problems... at least for light work
where extremely tight fitting is not necessary.
For heavier work using large rivets, the rivet must be heated to
a working temperature, placed, and be mushroomed over before it
can cool. As it cools, it shrinks, further tightening the joint.
Hull plates on older ships like the HMS Titanic were riveted, so
a properly fitted and riveted workpiece is capable of great
precision and strength. Quite possibly the Titanic's rivets
failed due to their not meeting specs... but this is
conjecture. There are ships still floating that date from
the Titanic's day and have riveted hulls. I have done some
riveting, with mostly small rivets. Probably the most common use
for a rivet that a blacksmith will encounter is the pivot for his
tongs. A rivet works well there.
There are special forges, special hammers, special anvils, and
other tools for riveting. If you plan to build an ark out of
iron. Perhaps you might have need of such items. Since an ark
will not be needed for survival in the post-apocalyptic world,
you might consider something else as an extra tool. I have found
that a simple hammer, anvil, and forge will suffice for most
riveting jobs.
Pop rivets are different from traditional rivets, though they
operate in somewhat the same way. Pop rivets require a special
tool called a Pop riveter. They have the advantage in that they
can be done "blind" with no access to the other side of the
surfaces being joined, however, they are not especially strong.
Use them to assemble sheet steel to be put under light loads. If
you need to build an armored vehicle to combat the armed mobs
besieging you and your neighbors... use heavier steel and
traditional rivets or bolts.
Other items used for mechanical fastening include nuts &
bolts, nails, screws... in an almost endless variety of sizes,
shapes, materials, and types. Get yourself a good supply of
mechanical fasteners. One can make mechanical fasteners, but
nothing is more tedious than spending a day with a nail header
and a bunch of nail rods making nails in the traditional way.
If you have need for a decorative rose-head nail on occasion, get
yourself a nail-header, and make these rare items up as needed.
Otherwise, get yourself a twenty-five pound box of nails in
various sizes and a selection of screws, bolts, rivets, washers,
nuts, lock nuts, and other common hardware before the giant
mushrooms start growing on the horizon. Your time will be better
spent getting Grampa's old steam-tractor up and chugging than it
will in making nails and rivets.
There are some modern adhesives that are truly amazing in their
capabilities. One of the most common is any variation of epoxy...
and there are specialized epoxies for many purposes. Polyurethane
glues like Elmer's Probond and Gorilla Glue are also amazing.
None of these will handle heat well, though, so use them where
appropriate. There are also adhesives used in aircraft
manufacture not generally available to the public. Some of these
are heat resistant. If you have a source of the stuff used for
repairing U2 airframes, you probably know more about such
substances than I do. Needless to say, such materials will be
rare in the post-apocalyptic era. Stock up if you think you will
need them.
Chapter
V, Heat Treating
 uch about the subject of heat treating is misunderstood by
most people... and even some otherwise fairly skilled smiths are
a bit weak in this area. It is a confusing subject.
uch about the subject of heat treating is misunderstood by
most people... and even some otherwise fairly skilled smiths are
a bit weak in this area. It is a confusing subject.
There are basically four types of heat treatment; hardening,
tempering, normalizing, and annealing. There are any number of
ways to accomplish each one, however, and the effectiveness of
the method varies with the type of metal being worked, not to
mention the skill and the effort of the smith.
Practically speaking, these kinds of treatment are only useful
when dealing with some kind of high-carbon or tool steel. Metals
other than ferrous metals can also be annealed, though the
technique varies quite a bit from what is common with steel.
Annealing brass cartridge cases is one common application for
this process.
Hardening is just exactly what it sounds like, treating the metal
in such a manner that it reaches it's maximum level of hardness.
Tempering is reducing that level somewhat to enhance other
properties. Annealing is the process of treating the metal such
that when cooled, it is as soft as it can be made without
re-heating it. Normalizing is done differently, but the result is
similar to annealing.
Of course everyone knows that the proper way to harden steel is
to heat it red hot and then to plunge it into water. A sword
blade thus treated will be virtually indestructible; flexible as
a whip and so hard that it can chop through a machine gun barrel
without marring the blade in the slightest. Right? Well... not
quite.
There are... problems with this method... especially when dealing
with the more modern alloys. Some of these alloys are amazing in
their capabilities. Their properties and heat treatment
requirements may also be quite exotic. Air hardening steel, for
example, should not be quenched in water, brine, or oil. It has
very specific requirements to achieve desirable properties. None
of those involve conventional quenching.
If you can get the steel, you can get a data sheet on it, and if
one is going to be playing with such magical stuff, one had
better be well informed. Otherwise, stick to conventional
materials that you know how to work with. For most practical
projects, simple high carbon steel will suffice for the most
demanding tool requirements.
The adamant of Greek and Roman mythology is neither needed nor
desired for simple hand tools. The forging of weapons,
particularly edged weapons is a whole 'nother kind of smithing,
however, and those who forge weapons and armor are often very
interested in new alloys.
Hardenability is dependent upon many factors, but the most
important one is carbon content. If it does not have enough
carbon in it, it cannot effectively be hardened by heating and
quenching. There is a substance known as "superquench", which
supposedly allows even mild steel to be hardened. I have my
doubts about this. I don't know much about superquench, having
never used it. There are several different formulas, most
involving the use of lye as an ingredient. There are other
formulas however, that use other ingredients, though most of
these ingredients will be in short supply in the post-apocalyptic
era. If you need to harden it, make it from high-carbon steel.
You'll need such lye as you can make for soap production
eventually.
To harden steel, heat it red hot and quench it. It really is that
simple. Now, what exactly is "red heat", and what do I quench the
steel in? Good question, apprentice, you are learning!
The proper hardening temperature for any given steel will vary
depending upon carbon content, and also other things alloyed to
it like molybdenum, chromium, arsenic, potassium, etc. Carbon
content is by far the most important factor having to do with the
composition of the steel, however. If you have a data sheet on
the steel you are working with, you will know the proper
hardening temperature. Matching that temperature with a specific
color that you may not be familiar with in a primitive forge,
however, is another matter entirely.
Most often in the post-apocalyptic era, you will not be able to
get specific alloys with nicely defined properties detailed in a
data sheet. You're gonna be after junk-yard steel... which is a
whole 'nother subject entirely that I'll go into in a later
chapter.
In general, a ferrous metal has reached its hardening temperature
when it loses its magnetic properties. In other words, when the
metal being hardened no longer sticks to a magnet, it is at the
proper temperature for hardening. This temperature is fairly
critical, so when it is reached, take a good look at it and try
to remember the color. A mechanic's pick-up tool, a magnet on a
telescoping metal rod works well to test the metal being heated.
You need not actually touch the metal... just feel for the pull
of the magnet. When it ceases, you have reached "red heat" for
the purposes of hardening.
Most high carbon steels can be quenched in either oil or water.
Tool steels sometimes get a little temperamental about what they
like to be quenched in. I ran across a crow-bar once the metal of
which would crack when quenched in water. If you get a piece of
metal like that, quench it in oil. Used motor oil will do unless
the work has to be used in food preparation. Transmission fluid,
vegetable oil, or any other kind will work. You have to submerge
the entire work when you do this as the oil will burst into flame
when touching the hot steel.
Exactly what to quench the work in depends upon the level of
hardness desired, the requirements of the material you are
quenching, and the availability of quenching media. If you don't
have any oil, you can't quench oil-hardening steel in it.
Hardening can also be accomplished by other methods. A needle can
be quenched, for example, by thrusting it into an apple or
tomato.
In times past sword blades were hardened by thrusting into human
flesh. I do not recommend human beings as a quenching medium.
This makes the smith rather unpopular with the friends and
relatives of the specific medium in question... to say nothing of
the medium himself... who may actually survive the process.
Besides, anything alive tends to writhe around when subjected to
hot steel, no matter how well restrained and might damage the
work in the process. If you must use brine as a quenching medium,
and water is in short supply, collect a bucket of urine. It may
not smell good, but it will work, as will the blood of a recently
butchered animal.
The post-apocalyptic era is not for the squeamish.
In general the faster the steel is cooled, the harder it gets. In
order of fastest to slowest, here are common quenching mediums:
superquench, brine, water, oil, air. Larger pieces to be quenched
such as anvils are frequently quenched by pouring a continuous
stream of quenching medium on them... in the case of an anvil, on
the working surface, the face. Remember that as the metal cools,
it shrinks. Thus, if it is not cooled evenly, it may crack. Keep
it moving when you quench it, and if it has specific quench media
requirements, follow them.
Once quenched, the artifact is hard. It is not very tough,
however, it is brittle. It may in fact be as brittle as glass. It
is rather disconcerting to see a piece of steel shatter into
shards... not to mention potentially dangerous. If you harden and
temper your work in separate steps, be careful with recently
hardened steel.
There is a process known generally as "case hardening". Case
hardening is not the same as conventional hardening in a heat
treatment sense. To case harden something, one packs it into a
container of any one of several carboniferous compounds marketed
under different trade names. One such trade name is Caseknit. The
container is then heated to a very high temperature and kept that
way for a period of time. The carbon from the compound then
migrates to and is absorbed by the artifact. In this way, an
artifact made of mild steel can have the outer surface rendered
much harder than the rest of the metal.
There are a few applications for which this is desirable for one
reason or another, but most smiths do not have the facilities or
the inclination to do case hardening. It really is quite
time-consuming and troublesome.
A variation of case hardening is color case hardening. Color case
hardening produces a hardened surface in addition to a random
color pattern as is commonly seen on Colt Single Action Army
revolver frames, Shiloh Sharps rifle receivers, and similar
applications. Color case hardening is somewhat more difficult to
do than conventional case hardening... and the practitioners of
this process guard their secrets well. For post-apocalyptic
operations, this is not especially important and there are other
things that should take priority to the smith's time.
The way to do case hardening effectively is to wait until you
have a number of articles to case harden and then do them all in
one batch. You'll need a very hot fire and it will need to be
kept going for an entire day or more to properly case harden the
work. In the post-apocalyptic era, this will be a difficult thing
to manage effectively. If someone is running a steam plant nearby
for local electricity generation or some other reason, the way to
proceed is to wrap your package in clay, plaster, or cement, let
it harden, and then put it into the firebox of the steam plant.
Just leave it there until the plant is shut down, then go
retrieve your package, break the covering, and quench the
case-hardened artifact.
Color case hardening is very much dependent upon the quenching
process, though, depending upon who you ask, there are other
factors such as inclusion of animal hooves, leather, etc. in the
hardening compound. The quench media can be water or any of a
number of other materials. I have heard that acids are commonly
used. I do not recommend this... it is dangerous to quench hot
metal in any substance, adding acid to the equation, which may
liberate hydrogen upon the addition of iron, strikes me as a bit
foolhardy. Other methods involve a rising column of bubbles in
the quench media. Supposedly the bubbles in the quench material
rising to the surface are what cause the color pattern.
If you want to try case hardening, be careful. Use safety
goggles, acid proof clothing if you want to try acid, do not
breathe the fumes, and good luck to you.
Most often the product obtained by case-hardening is simply not
worth the effort needed in a post-apocalyptic world, but if one
really wants something casehardened for some unfathomable reason,
with much experimentation, it can be done.
Normalizing metal is done by heating to hardening heat and then
allowing it to air-cool. By this method, the metal is rendered
relatively soft. You would do this if you wanted to file, grind,
engrave, polish or do some other cold machining of the artifact
before hardening and tempering.
Annealing is done for the same reasons as normalizing; to make
the metal soft. The difference is that with annealing, the metal
is cooled very slowly. If you have facilities to do so, you can
cool it over several days. Some smiths use Vermiculite, asbestos,
or other insulating materials.
When I want to anneal something, I wait until I am almost done
for the day, then heat the artifact up until a magnet will no
longer stick to it, bury it in the coke and let the fire go out,
covering my forge with an old Weber grill cover. It will take
several hours to cool and the metal is rendered soft enough for
most cold machining operations.
Typically one forges the work, normalizes or anneals it, performs
any necessary cold machining operations, hardens it and finally
tempers it. There are ways and means of hardening and tempering
in one operation. A chisel, for example, can be shaped by
forging, have a blade rough ground on it after normalizing, and
be hardened and tempered in one operation. I'll detail these
techniques at the end of this chapter.
After the workpiece has been hardened, one then must temper it.
In some cases, this must be done immediately, as certain alloys
will develop longitudinal cracks if it is not quickly
tempered.
Drawing/tempering is that part of smithing that is extremely
critical. If you want to produce usable tools in your smithy, you
must become an expert at this. There is an almost endless variety
of techniques to produce properly hardened and tempered working
surfaces. No one method is best for every smith or every
application. Springs are probably the most challenging heat
treatment task for any smith, and as might be expected, there
have been many tricks developed over the years.
When an artifact has been hardened homogeneously, that is to say
that it was heated to hardening temperature and then entirely
quenched, tempering is a second step in the heat treatment
process. The exact procedure will vary a bit depending upon the
application. Making a tool bit for a metal lathe for example
requires the bit to be brought into a state of homogeneous temper
throughout the entire artifact. This can be a tricky process, and
is best accomplished by using a kiln equipped with a pyrometer.
You may not have such a luxury however, in the post-apocalyptic
era.
If you do not, you will have to experiment until you have your
technique down to a science. One way to homogeneously temper an
object is to build a small kiln of sorts over the top of the
forge with firebrick. After the interior of the kiln has been
heated one can place the artifact to be tempered inside the kiln
and watch it carefully for color, pulling it out quickly when it
reaches the proper color/temperature and quench it.
Relatively few tools, however, require homogeneous tempering.
Most are made hard at the working surface, leaving the rest of
the tool relatively soft. A cold-chisel is a good example. This
tool must have a sharp edge that retains its shape even as it is
used to cut iron and steel. The other end of the tool, however,
must take repeated hammer blows. It cannot be rendered overly
hard or it may shatter when struck. This is why when one sees a
cold-chisel that has been used a bit, the cutting edge may be
sharp, but the other end is battered and mushroomed over with
steel that has been deformed by hammer blows. One must often
dress such a tool on a grinder in order to avoid having bits of
metal fly off under use.
There are a number of ways to temper a tool such as this. The way
I first learned it was to harden the tool by quenching and then
polish it to an almost mirror sheen. This can be done with a wire
brush, a fine grindstone, or a whetstone. At this point, you've
(hopefully) got a very hard and brittle tool... be careful not to
drop it on a hard surface, it may shatter like glass.
Now, the tool must be slowly heated from the striking end. As you
watch it , you will notice color bands forming on the surface of
the tool. The color bands represent different levels of hardness.
The hardest color band is a light straw color and the softest a
dark blue color. The color bands will slowly march down the
length of the tool until the reach the cutting surface. Now it
must be quickly cooled by quenching before the edge can become
too soft. Quench it cutting edge first to arrest the process
immediately, then slowly submerge the rest of the tool.
Heating the tool can be done in the forge, and in the case of a
cold chisel, this will work fine. One can also use a blow torch
for this purpose, and this is one of the best tools available for
that purpose. There is danger in getting a tool overly heated on
the striking end because if it gets red hot, and is subsequently
quenched, it will again become hardened, necessitating a repeat
of the process. It should be noted that a fire hot enough to
bring the work to red heat is not necessary.
The heat source need not be a fire. In the case of a knife blade,
for example, tempering may be accomplished by bringing the back
of the knife very close to or actually in contact with a red hot
piece of steel. This will afford better control of the
process.
Variations of this type of tempering process are called drawing.
In order to be certain that the tempering is done evenly, the
process may be repeated. This may be termed double-drawing or
triple-drawing. Normally you will see high-quality wood chisels
and such that are double or triple drawn. Screw drivers and such
are normally only drawn once.
If this sounds unnecessarily complex and time consuming, there
are other options, though the process of drawing a tool to the
proper temper is probably the most common and useful method for
most tools. One method for tempering a small lock spring I have
read about involves hardening it in oil, and then dipping into
sawdust. The sawdust will adhere to the oil and coat the spring.
The next step is to hold the spring over the forge until it
catches fire, allowing all the oil and sawdust to burn off. This
supposedly gives a spring that is perfectly tempered.
In my experience, nothing is ever that simple. The methods that
work will vary greatly depending upon the size of the spring, the
quenching medium used, and most importantly, the composition of
the steel. You can try this if you need to replace a spring in
the lock of a muzzle-loading firearm or something, and if it
works with a particular alloy, take note of it. If it doesn't
work, you will have to try other methods.
Tempering small parts in the post apocalyptic era will have
modern smiths tearing their beards out until they have adapted to
the new conditions and learned new techniques.
Take a good look at your text books on the techniques of drawing
and tempering steel. Learn these chapters. Practice the
techniques while you can still get steel relatively cheaply.
Currently, most general blacksmiths make their living by wrought
iron work. Tools will likely be a more important stock in trade
for the post apocalyptic smith.
Not every tool needs to be hardened and tempered. Plow points,
for example do need to be hard, but this is less critical in the
case of a hand tool like a hoe, which can be made of mild steel
and simply quenched when finished. It won't be as durable as a
hardened blade, but it doesn't take as much to make, and remember
that the first hoe was probably made of wood and/or stone, bronze
and/or copper coming later on.
Always remember that in the immediate post-apocalyptic era,
resources may well be in short supply. Use high carbon steel for
critical tools, not for boot scrapers, nails, and wall hooks.
Save stainless steel for items that must be rust-proof for some
reason. Depending upon what has caused the situation to be
defined as post-apocalyptic, you may be facing shortages that may
last a year, seven years, or for the rest of your life.
Chapter
VI, Junk-yard Steel
here is an old adage that states; “One man's trash is
another man's treasure.” There is much truth in that statement.
While in Northern Iraq during the aftermath of the first Persian
Gulf War, I frequently saw Kurdish refugees scrounging our trash
dump for things we had discarded. A broken tent peg (or sometimes
one that was not broken) was perfectly good firewood to cook
dinner over. Discarded portions of MRE's were also sought after.
Probably the most highly regarded item, though, was the metal tin
that our T-rations were shipped in.
After the food they had contained was cooked and served up to the
soldiers, they were “junk” to us, and we threw them out with the
rest of the trash... until we noticed the refugees “mining” the
trash dump for these treasures in particular. At first we were
mystified. What in the world did they want with used tins like
these? We eventually noticed the tins being stored in and around
the refugees' tents. At last, an explanation came forth.
The Kurds had been chased out of their homes with the Iraqi
military hot on their heels. They left, typically in the back of
a wagon pulled by something like a 1950's era Ford/Ferguson farm
tractor with their families, a few blankets, AK47's and
ammunition, other weapons, and little else. Some left on foot
leading an ass, horse, or other pack animal. I know of one woman
who walked sixty miles while in her eighth month of pregnancy.
Needless to say, she didn't carry much other than her child. A
few thoughtful individuals brought along a wok... which is a very
useful cooking utensil that cooked Mid-Eastern flat-bread (in an
inverted position) as well as rice and various meat stews.
Most of these refugees, however, had either not thought to take
cooking utensils or been too rushed for time to do so. The
various NGO's as well as the US military supplied food for the
refugees, as well as water and shelter, but nobody had thought to
supply cooking utensils in any great numbers. Hence the trash
miners.
The T-rat tins were waterproof, did not burn, and most
importantly, were available locally. Thus, they became the
cooking utensil of choice among the ingenious Kurdish refugees.
Eventually, the shortages were addressed and woks were supplied,
but for a while there, T-rat tins were all the rage. We had to
start saving the tins and passing them out on trash day in order
to keep the miners out of the trash.... which was a great source
of disease and injury. This way there weren't as many fights over
the tins, as ownership was immediately established upon
possession. When digging through the trash, there was always the
possibility of a “claim jumper” grabbing a tin from the miner's
pile.... which could end in bloodshed!
These Kurdish refugees had the right idea in their Time of
Trouble... and so in our own post-apocalyptic era, we will likely
take a page from their book of wisdom.
A common junk yard filled with automobiles in various states of
damage and completeness is a ready source of materials for the
post-apocalyptic blacksmith. It should be obvious, though, that
not all steel is created equal. Some parts of automobiles are
better for some purposes than others.
Springs, either coil springs, or leaf springs, are made of
high-carbon steel. They are extremely useful in tool making.
Likewise torsion bars. You can harden and temper these steels to
fit virtually any common use.
In the case of a coil spring, one can either straighten it out on
the anvil and then cut it, or cut it first and then straighten
out the sections. Coils springs are to be found in various sizes
depending upon their original applications, so you can have stock
readily available to form a doctor's scalpel (from an old garage
door spring) or a mason's hammer head (from a heavy truck
spring).
Leaf springs are infinitely useful for making farm implements
such as hoes, pickaxes, adzes, mattocks, knives, scythes, etc.
Most of the drawing out has already been done, and it will only
need minor shaping to be made into a tool. These steels are
fairly common stuff and do not require any special heat treatment
to fit them for use in tools. Just harden them in water or oil,
temper them as needed, and they'll serve fine.
Internal engine parts are of limited utility. Shafting is
normally a high-carbon steel, but a crankshaft or camshaft
requires a bit of work to get at, and a good deal of work in
shaping it for use in most tools. Poppet valves are interesting
things. They are made to retain their shape and hardness even at
red heat... hence their use in engines. This will likely cause
the smith trouble when he tries to forge them. Some internal
engine parts, most notably valve heads, are sometimes filled with
sodium. For this reason alone, do not attempt to forge them or to
grind them. Sodium will explode under such circumstances, and it
is also quite poisonous. If in doubt, assume the worst and let
the valves lay in the junk yard... unless you need the valve as a
valve. Valve springs are another story, and are good quality
high-carbon steel in a small size. Grab 'em if you can get
'em.
Drive shafts from front-wheel drive vehicles (or older RWD
Volkswagen/Porche vehicles) are all made of good-quality
high-carbon steel. They are already straight, and are of
sufficient diameter to be useful for many purposes.
Vehicle frames are most often too large to be all that useful as
raw stock for a forge, though they might have other uses. A
chassis with wheels on it yet can be fitted with a tongue, a bed,
sides, etc., and used for a wagon. to be pulled by animals or a
tractor.
Car bodies are a ready source of sheet steel. Cutting the roof
out of an old Cadillac will provide the post-apocalyptic smith
with a large section that would have taken days to draw out on an
anvil, not to mention more coal/charcoal than he likely has
available. Sheet steel is incredibly useful stuff. You can make
from it spatulas, small shovels, buckets, and other items too
numerous to mention.
Probably the most sought after scrounge in the junk yard is tool
steel. This you can find in grader blades, bucket teeth, and any
kind of farm implement that has some kind of chopper head in it.
Grab all you can get of this magical stuff.
Not all vehicles should immediately be carved up for scrap metal,
however. If you are so fortunate as to have found an operational
Ford Model A or Model T (or similar early car/truck), grab that
machine and store it carefully. It will be capable of traversing
deeply rutted roads that only a modern SUV could manage.... but
it will do it at much greater efficiency. Remember, your public
servants have their own problems now and will not be out
maintaining the roadways... which will quickly fall into
disrepair.
Usable gasoline will be quite valuable for a while after a
disaster. I remember a man coming up to me and asking for some
one night in Northern Iraq. He had run out of gas with his Land
Rover. None of our vehicles ran on gas, only Diesel, so he was in
pretty dire straights. We did, however, have a gasoline
generator, and while we could not spare him the remaining five
gallons we had on hand for it, I was able to accumulate about a
half gallon from dredging the last drops out of all the remaining
“empty” gas cans. Given a gas-engined Land-Rover's thirst for
fuel, I figure he got five or ten miles before he ran out of gas
again. Still, he was closer to home than he had been.
Likewise, any vehicle, especially a large vehicle, that runs on
Diesel fuel is another type of community treasure. Diesel powered
school buses are great for moving refugees and supplies around.
Unlike gasoline, Diesel fuel can be store for fairly long periods
of time, and most Diesel engines will also run on Kerosene. (Yes,
traditional Kerosene lamps and lanterns will burn Diesel fuel,
but not very well... too much sulfur content, for one thing. Do
this only in an emergency.) It should be noted that most
government vehicles run on Diesel or glorified jet fuel. It will
likely become the most commonly available petroleum based fuel
around.
Don't cannibalize operational vehicles that might have some use
if you can avoid it. Even after the gas is all gone, there is
such a thing as wood gas, not to mention alcohol, both of which
can be manufactured locally if necessary.
A related field within blacksmithing is tin smithing. We
have to remember the story of the Kurds in Northern Iraq and
their precious T-rat tins. Almost certainly, you will end
up with prodigious quantities of tin cans of various sizes and
shapes that previously contained tuna, beans, mushrooms, tomato
paste, etc.. Don't throw those precious items in whatever
passes for the trash! They are extremely valuable items in
the post-apocalyptic world.
It might take a day for a skilled blacksmith or tinsmith to make
a water-tight, food-grade, fireproof tin if he has to actually
draw out the sheet metal. If he has sheet metal available,
the time factor is greatly reduced, but when you already have the
utensil on hand, why go to any trouble to make another one?
It takes very little effort to attach a handle to a soup can for
a tin cup, though it can serve as it is as soon as it is opened
and washed out. A tuna can filled with ashes that are
soaked with Kerosene, gasoline, or alcohol can make a tolerable
camp stove when placed under some kind of support structure for
another can that contains something that needs to be heated.
Remember, resources are scarce now, don't waste anything that can
be used in some way.
Making one's own iron and steel can be done... but it is
extremely labor and fuel intensive. There will likely be quite
enough steel around in junk yards and farm fields to supply the
needs of most families for several years. If you've got a bunch
of cast iron around that is not serving any useful purpose and
lots of charcoal, you might try to make some wrought iron, but
there are better ways to spend one's time than this.
Actually mining iron (or other metals) is far more trouble than
it is worth in the post-apocalyptic era. Don't bother unless you
are an experienced mining engineer... and if you are, you don't
need this book, you can write your own.
Chapter
VII The Smithy
smithy is, in a nutshell, a place for the
blacksmith to work. It can be as simple as a shaded area behind
the house with a portable forge and anvil or as complex as a
full-blown workshop with a permanent masonry forge, several
powered machines, and a 500 pound anvil.
In general, you want some place that is out of the wind a bit...
grampa's workshop might be just the ticket. Then again, it might
not. While some smithies have wooden floors, most do not. A
wooden floor is an obvious fire hazard... put some sheet metal
over the top of it where you work with hot metal. If you can
manage it, a concrete floor is desirable, but not essential.
Traditional smithies have had dirt floors with the anvil stand
sunk into the dirt a fair distance. This is better than a wood
floor.
Ventilation is extremely important, unless you enjoy breathing
noxious gases. Your forge should have a chimney or else be vented
other ways. In the Summer months, those warm months when I do all
of my own work, a pair of open doors or windows may suffice. If
the building has open eaves, you won't have any trouble with
smoke... though you might have trouble with wasps and other
flying pests.
Unfortunately, one cannot count on things breaking only during
the Summer. In my experience working around farms, things most
often break during the Winter... and often it will be something
like a manure spreader with a full load that cannot be allowed to
freeze. Time for another story.

 During the first Persian Gulf
War, my unit, the 432nd Civil Affairs Battalion was billeted in
Al Jubail, quite far South of Kuwait City. Before the Iraqis left
Kuwait, they set as many of the oil wells on fire as they could.
This didn't concern us all that much at first... but after a
couple of weeks had gone by, it started to get cold. We could see
the sun, through clouds of smoke, but in Saudi Arabia, we had to
break out the field jackets where before we'd been running around
in T-shirts and shorts when not in uniform.
During the first Persian Gulf
War, my unit, the 432nd Civil Affairs Battalion was billeted in
Al Jubail, quite far South of Kuwait City. Before the Iraqis left
Kuwait, they set as many of the oil wells on fire as they could.
This didn't concern us all that much at first... but after a
couple of weeks had gone by, it started to get cold. We could see
the sun, through clouds of smoke, but in Saudi Arabia, we had to
break out the field jackets where before we'd been running around
in T-shirts and shorts when not in uniform.
Yes, those are land mines on the surface of the road and in the
sand on either side of the road. The time of day was, if I
recall correctly, about 0800 hrs, and the sun can be seen above
the horizon in the center of the photograph below.
The lighting conditions are accurately portrayed.
These photographs were taken with Kodachrome 25 color slide
film... if I remember correctly... and it was a difficult task to
shoot with it in such dim light.
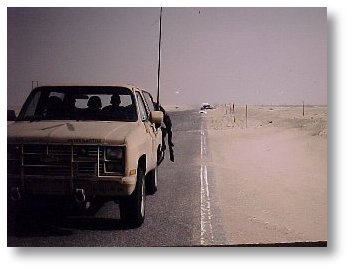 Later on, when we entered Kuwait City itself, we had to have
our headlights on to see to drive, even at noon. Twice a day, we
had to wipe tar off the windshield and the headlights. It was
even more cold then it had been to the South.
Later on, when we entered Kuwait City itself, we had to have
our headlights on to see to drive, even at noon. Twice a day, we
had to wipe tar off the windshield and the headlights. It was
even more cold then it had been to the South.
This is my experience with what has been called a mini-nuclear
winter by SSG Steven Dutch, a geology professor who deployed with
us. Now the effects of that smoke were limited to a local area...
and only the oil wells had been set ablaze. For the most part,
the largely concrete and masonry structures of Kuwait were intact
and unburned.
A real nuclear war would set everything ablaze and hoist it far
into the stratosphere. The effects would not be local, they would
be global, and while what I experienced was fairly short term, a
global nuclear war's winter could last for decades if not longer.
Also, while the mean temperature was somewhat lower than normal
in the Persian Gulf region, a real nuclear winter would be much
more severe.
In other words, you cannot count on warm weather. You will quite
likely have to provide your own. Plan on having your smithy
closed up from the cold, an overhead draft for your forge, and a
supplemental heating system within the smithy. A pot bellied
stove will work, as will any other cast-iron stove, or even a
barrel stove. An M1945 US military tent stove is not a bad item
to have around.
 Miles likes Kerosene heaters, and so do I, especially when
it is desirable not to send “smoke signals”. Indeed a Kerosene
heater is well suited to heating the smithy... but you will
eventually run out of Kerosene, and if you have a woodlot, you
may not run out of firewood. Also, remember that if you have a
lit forge, you are sending smoke signals anyway. Hint: charcoal
doesn't make as much smoke as coal does.
Miles likes Kerosene heaters, and so do I, especially when
it is desirable not to send “smoke signals”. Indeed a Kerosene
heater is well suited to heating the smithy... but you will
eventually run out of Kerosene, and if you have a woodlot, you
may not run out of firewood. Also, remember that if you have a
lit forge, you are sending smoke signals anyway. Hint: charcoal
doesn't make as much smoke as coal does.
Be sure to put a spark arrestor on the chimney... and a metal
roof is better than cedar shakes for this application. If it can
have a stone foundation a couple of feet above floor level, so
much the better. A complete stone or concrete block wall is
great, but not necessary.
Other than that, the requirements are fairly simple; enough space
to work, room to walk around everything within the smithy (you
really don't want to try to chase a red-hot piece of metal you
just dropped that is leaning against a wooden wall just out of
reach behind the trip hammer), and enough room to store the stock
and tools.
If you are going to be working on wagons and/or
horses/oxen/mules/asses, you need more room as well as some extra
space in a separate building for the animals.
Chapter
VIII What Should I Make?
 hatever you wish. Perhaps it would be more prudent to
suggest things not to attempt. Don't attempt to make any
firearms. There are enough of them around as it is, and you don't
want a bad weld or a slag inclusion to cause a breech failure.
Keep the existing ones in working condition. A good quality rifle
or shotgun will last a couple of hundred years. That's longer
than you'll need it.
hatever you wish. Perhaps it would be more prudent to
suggest things not to attempt. Don't attempt to make any
firearms. There are enough of them around as it is, and you don't
want a bad weld or a slag inclusion to cause a breech failure.
Keep the existing ones in working condition. A good quality rifle
or shotgun will last a couple of hundred years. That's longer
than you'll need it.
You might be tempted to make a steam engine. Before you go
through all that effort, check into the feasibility of adapting
an existing engine or other device for that purpose. Steam
engines can be quite useful, but they were supplanted because of
inefficiency among other reasons. Check other areas of Miles'
site for more information on home-grown steam power.
Also, you might wish to visit the site of Tiny Power, who make small steam
engines and kits, among other things.
Don't waste any effort on iron armor. A standard .30-'06 round
will defeat any armor that you could conceivably wear on your
body. Just because the bombs have fallen does not mean that you
will be facing only mobs with pitchforks and spears. The mobs
will be there, but they'll have guns and ammunition.
Don't make swords, battle axes, spears, lances, or other
primitive weapons either. Your enemy's deer rifle shoots further
than you can launch an arrow or spear. As to swords, well only a
fool brings a knife... even a big knife... to a gun fight. After
the ammunition runs out it still won't be time for swords, it'll
be time to learn how to make black powder and reload your own
shells. Hint: muzzle-loading firearms (either flintlocks or
percussion), breach-loading percussion rifles and percussion
revolvers do not require cartridges.
What will you need? Well, it depends.... if you were smart and
laid in a supply of hand tools, farm implements, and the like,
when you could still buy them cheaply, you may not need to make
anything, at least initially. Set up your smithy and just wait
for something to break or wear out.
Almost certainly, you will be without electricity within a short
time after the bombs fall. The grid will go down from a massive
EMP, and it will take everything that is plugged into it down as
well. Assuming the authorities get right on it, it will be months
if not years before power is restored. They will not bother to
get right on it, however. There'll be other things to worry about
than restoring power to outlying areas.
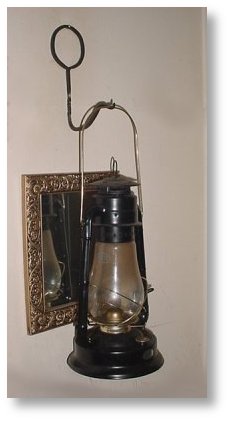 First things first, then. You'll need light after the sun
goes down. Hopefully, you will have purchased a supply
of
First things first, then. You'll need light after the sun
goes down. Hopefully, you will have purchased a supply
of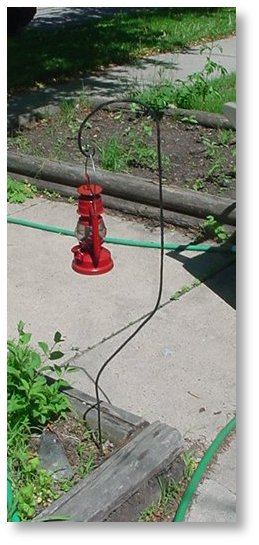 Kerosene and some lanterns to burn it in. As soon as you
get your smithy set up and all the other immediate needs taken
care of, you can start making some wall hooks to hang lanterns on
(left), and maybe a shepherd's hook or two if you think you will
need outside illumination.
Kerosene and some lanterns to burn it in. As soon as you
get your smithy set up and all the other immediate needs taken
care of, you can start making some wall hooks to hang lanterns on
(left), and maybe a shepherd's hook or two if you think you will
need outside illumination.
I take a certain measure of pride in my hook designs. God
gave me more talents than I deserve, and while I frequently
misuse my talents, my hook designs are first rate, even if I do
say so myself.
I have several variations of wall hooks, but all of them start
with a circle that is intended to be hung on a nail. The
circle provides a measure of stability in case the hook should be
bumped and hanging from one nail is a much simpler installation
than other hooks requiring two or more anchored screws to
secure. The lower portion of the hook is a fair distance
away from the base so as to facilitate less pulling stress on the
nail. A hook like this one will hang your lantern perfectly
level and securely out of reach for small children.
The shepherd's hook above right differs from conventional
shepherd's hooks in that the weight is directed straight
down, as opposed to off at a slight tangent. One of my
hooks can stand in a bucket of sawdust with even the weight of a
Coleman lantern suspended from it. Conventional hooks often
fall toward the weight they support when the ground becomes
saturated with rain water. Mine remain at the position of
attention.
I mention this not so much to brag about my superior design
abilities, but rather to point out that it pays to spend a fair
amount of time considering before even lighting the forge.
Two tools help with this; a drawing pad and pencil, and a length
of flexible wire.
Hint: You've got illumination. The folks that are going to be
fleeing the cities and maybe some of your neighbors will not be
so well off, and they will be drawn to any visible light like
moths to a flame. 
They'll also eat the food you've got squirreled away like
ravenous locusts. Don't advertise your good fortune... inside
illumination only unless you really need some light outside at
night for a specific purpose. Keep the windows shuttered and only
burn one lantern at a time... move it from room to room as
needed. If you've got a red globe for it, so much the better...
it won't ruin your night vision, and you should keep watch for
the first few nights at very least.
If you didn't get your Kerosene and/or lamps and lanterns
purchased in time, then you will need candelabra for the candles
you will have to make. Candelabra can be as ornate as you wish
them to be, but they need not be especially fancy to get the job
done. The basic task it must do is hold a candle securely,
provide a convenient means to move it around the house, and
collect the wax that will melt off of it. Be careful in your
execution.... candles are just about the most  dangerous thing you will
encounter in the post-apocalyptic world. Mrs. O'Leary's cow
likely did not kick over a lantern to start the Chicago fire, but
more likely a candle. Hot and cold blast lanterns go out when
they are upended, candles simply ignite whatever they happen to
land on.
dangerous thing you will
encounter in the post-apocalyptic world. Mrs. O'Leary's cow
likely did not kick over a lantern to start the Chicago fire, but
more likely a candle. Hot and cold blast lanterns go out when
they are upended, candles simply ignite whatever they happen to
land on.
Candle lanterns are quite useful. These can be made from sheet
steel, and are most easily made from standard steel cans such as
the ones your beans are likely stored in. One of these cans
punched with plenty of holes around the periphery can provide
adequate light at night and still be relatively wind proof. Not a
bad idea to provide a means of darkening it suddenly if
needed.
There are a few candle lanterns made commercially today... mostly
out of Japan and China. Stay away from paper lanterns, not only
are they not durable, but they can be fire hazards. There are
some that are simply modified traditional cold blast lanterns.
Instead of a burner, they have a cup that holds a tea light. Tea
lights can be bought cheaply in large quantities. These lanterns
will work outside quite well, and are proof against fairly strong
wind... but they do not do well in cold weather. The wax will not
melt around the periphery of the candle in cold temperatures and
thus it will not burn.
Keep lanterns on hooks whenever possible. Any hot or cold blast
lantern tends to extinguish itself when overturned... but it will
still spill its fuel, which is a rare and valuable resource in
the post-apocalyptic era.
Dietz makes the best traditional Kerosene lanterns, though not
necessarily the cheapest ones. Dietz for personal use, cheap
off-brands for trade.
If you did not bring farm implements, you will need to either
secure them or make them. You need at minimum a hoe, a rake, and
a shovel. Pioneer tools such as axes, fros, mattocks, and the
like may be needed as well for various things. You'll need knives
of various types and sizes. Knives are difficult to make. Wait
until you become proficient. You're also gonna need some tools
for smithing. Make several pairs of tongs, a few hardies, and
other anvil tools. A small mandrel is useful to have around
 Get busy making some of these tools before you need them.
When you do need them, time will be in short supply, if it isn't
already. Remember also that it never hurts to practice. A
would-be smith who has spent the previous months making hooks and
other pieces of hardware has a much better chance of successfully
repairing a walking plow than one who has been reading books
occasionally while loafing when he has “nothing” to do. Hint:
There is always something to do in the smithy.
Get busy making some of these tools before you need them.
When you do need them, time will be in short supply, if it isn't
already. Remember also that it never hurts to practice. A
would-be smith who has spent the previous months making hooks and
other pieces of hardware has a much better chance of successfully
repairing a walking plow than one who has been reading books
occasionally while loafing when he has “nothing” to do. Hint:
There is always something to do in the smithy.
Chapter
IX Other Tools and Machinery
hile one can make most anything with just the basic tools
of hammer, forge and anvil, there are a number of machines that
make life much easier for the smith. Many of these will be hand
tools, like bolt cutters, for example, mentioned in a previous
chapter.
This chapter will deal mostly with floor machines. Don't plan to
load a bunch of these machines into your school bus two days
before the bombs fall. If you are going to have a smithy this
well prepared, you had better get it set up immediately if not
sooner. These machines are heavy and bulky. There will not be
room for all of them in one trip.
A common machine in even fairly early smithies was a trip hammer,
or power hammer. This machine replaces an apprentice for some
work. It forges metal with a much heavier hammer than a smith
would normally wield and can tirelessly deliver many blows per
minute exactly on target with exactly the correct amount of
force. There are wide variations in the design ranging from
hydraulically operated machines to primitive devices that simply
use a cogged wheel that alternately lifts and drops a heavy
sledge hammer.
Power hammers and trip hammers have probably crippled more smiths
than all the horses that have ever lived on the Earth. Keep the
floor clear, and don't put your hands near the moving parts.
These machines are dangerous.
A swedge block is a block of steel or cast iron with recesses of
various sizes and shapes formed into it. It is used to make
shapes otherwise difficult to forge, such as triangular bars.
I've never found I needed one, and they are heavy and expensive.
By an extra anvil instead or a floor mandrel.
The drill press is extremely useful and can save hours. It is
much easier and simpler to drill a hole than it is to punch one,
and it will be perfect every time. To go along with it, a set of
drill bits and at least one extra chuck key.
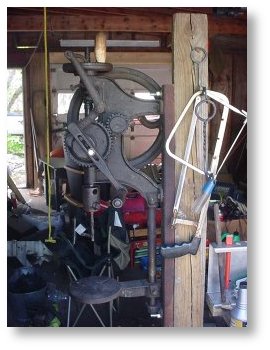 The post drill is a variation on the drill press. Time was
when every farm in the country had a post drill in one of the
buildings. The biggest advantage in a post drill is that it is
designed to be run with no electricity, using hand cranks for
motive power. A feed mechanism using a cogged wheel, cam, and
rocker, feeds the quill as the drill bit is rotated.
The post drill is a variation on the drill press. Time was
when every farm in the country had a post drill in one of the
buildings. The biggest advantage in a post drill is that it is
designed to be run with no electricity, using hand cranks for
motive power. A feed mechanism using a cogged wheel, cam, and
rocker, feeds the quill as the drill bit is rotated.
They normally require a special blacksmith's drill bit, that is
to say, a 1/2” shaft drill bit with a flat side machined on it
for the lock screw to hold it in the primitive vise. It is
possible to convert to a conventional three jaw drill chuck. One
needs only a 1/2” arbor that is threaded to accept the new chuck.
The shaft can then be chucked into the original chuck. A post
drill thus converted can use conventional drill bits.
Post drills are one of the few antique tools that are relatively
easy to locate. Be prepared to pay what is asked for a drill in
good condition with all the parts, and also to repair a drill
that you got cheaply... possibly having to replace some missing
parts... perhaps even having to make them from scratch. I would
say to generally avoid those that have been converted to electric
operation. They were never intended to be used at the high speeds
an electric motor can impart, and unless the owner took pains to
keep it well lubricated, its bearing surfaces may have
suffered.
Lay in a good supply of heavy grease. Slick-50 One Grease works
well, and the Teflon content adds to its lubricating ability.
Eventually, you may be down to rendered animal fat, but avoid it
as long as you can. Most machine tools require some kind of
lubricant in normal operation. Cutting oil will also be necessary
for some of them. I’ve always liked Marvel Mystery Oil.
A metal lathe is the one machine tool that can completely
reproduce itself without any others. You will need a complete set
of tooling to go with it including a four jaw independent chuck
and a three jaw universal chuck. Get a ball-bearing dead center
if possible. When it finally wears out, you can make a solid one.
Have a ready supply of tool bits... carbide ones if possible.
They will outlast the standard tool steel ones.
Milling machines and shapers are nice to have, but only if you
really have a need for them. If you are going to be building a
steam locomotive or a triple expansion steam engine, perhaps you
could justify the added expense and trouble of setting up either
of these machines. Otherwise, leave 'em behind and buy yourself
an extra couple years' worth of food and Kerosene.
A modern welder, whether an electric one or a gas one is
extremely useful as long as you can get the gas or the
electricity it requires to run. When that is gone, you have a
really heavy paperweight or an anchor. Learn how to use one of
these things before you buy it and use it while you can.
An electric generator is quite useful as long as you have fuel
for it. Diesel is the best way to go, but even a gas generator
has its uses while fuel is still available. If you intend to
power your floor machines with it, you'd be well advised to get
one that is large enough. A little Coleman camp generator is not
going to cut it.
A stationary engine can be quite useful for a variety of things.
If your machines are not direct drive and use pulley systems, a
stationary engine can be set up to run them in the absence of
electricity. Briggs & Stratton and Tecumseh both make
reliable air-cooled engines that would be suitable for such
things. Setting them up is beyond the scope of this article,
however. Bear in mind that you get more efficiency using the
engine directly rather than converting its energy first to
electricity and then back again to mechanical energy.
A farm tractor might seem to be the most unlikely requirement for
a smithy, but they are infinitely useful machines. They have,
among other things, a power take-off unit... sometimes more than
one kind of power take-off. You can use these to run your floor
machines, to run a generator, if you must have electricity, and
to haul coal and charcoal, and also the obvious uses that it was
originally designed for. I myself would prefer something small
like a Farmall Cub or A, but a Ford 8N or 9N will serve just as
well. One of the modern monsters with four-wheel-drive and all
the bells and whistles will not long be running in the post
apocalyptic world, as there will be nobody able to fix them when
they break for one thing, also that extra horsepower requires
quite a bit of fuel.
There are “alternative” fuels that can burn in spark ignition
engines... alcohol and wood gas are just two of them. A
discussion of how to make them is beyond the scope of this
article. I seem to say that quite a bit... perhaps I should
expand the scope of the article a bit. Nah... maybe later.
A smithy that has all these machines is far beyond what most
people would need. This is a blacksmith's dream shop... and
having one could be of great benefit to a community if it were
able to support and defend it. For most practical purposes... you
need only the basics and a few of the luxuries, if you can manage
it.
Chapter X
The Neighbors
 ou are gonna have neighbors, like it or not. So... first
the obvious question; how do the neighbors relate to post
apocalyptic smithing operations? The fact of the matter is that
everything affects everything else. It is said that the wind
raised by a bird's wing can eventually become a storm. Well, with
the wrong set of neighbors, the storm that a puff of smoke from
your forge might initiate could be especially violent... and
unfortunately, right next door. So it is that we come to the
neighbors.
ou are gonna have neighbors, like it or not. So... first
the obvious question; how do the neighbors relate to post
apocalyptic smithing operations? The fact of the matter is that
everything affects everything else. It is said that the wind
raised by a bird's wing can eventually become a storm. Well, with
the wrong set of neighbors, the storm that a puff of smoke from
your forge might initiate could be especially violent... and
unfortunately, right next door. So it is that we come to the
neighbors.
One of the many things I learned during my time in an Army civil
affairs battalion is that in the aftermath of any disaster,
whether it is a battle, a famine, or a natural cataclysm of some
type, there will be shortages of water, food, fuel, medicine,
and/or any one of a number of things. There is one thing that
there is never a shortage of, however; refugees.
In the aftermath or even prior to the apocalypse, they are going
to come boiling out of the ruins of large cities. Many of them
will be useless people who are accustomed to having everything
given to them by the sweat of others. They will be most upset
when they go to the store and find that not only will their
welfare card not work, but that there is nothing in the store to
buy even if the card did still work. Unfortunately, many of these
individuals will go feral and start simply taking whatever they
wish from others. Remember Hurricane Katrina?
Thus, some morning about a week after the mushroom clouds began
growing, you will awaken to find a group of former city dwellers
encamped in your field with their Coleman tents and SUVs parked
right on top of a field of oats that was almost ready to harvest.
Count to ten, now, remember that they are likely here because
they have nowhere else to go, and they didn't deliberately crush
your food supply... to them it was just brown grass.
The first thing to do is assess them as a group. Are they
potential allies? Escaped criminals? Did they bring anything
useful, or are they truly useless people too stupid to know how
to take care of themselves. This initial survey, conducted with
firearms at the ready, will determine how to deal with them. If
they are not openly hostile, talk to them, in Spanish or broken
English if necessary, get an idea of their needs. If they are
short of water and you have a well with a hand pump, enlist the
aid of some of their young men and get some water distributed.
Don't immediately volunteer that you have food or anything
else... you'll get a better idea of what they have just by
watching them.
Check out their skills as well. Are any of them nurses or
doctors? Soldiers or former soldiers? Drug dealers? Legitimate
pharmacists? Mechanics? In short, decide quickly whether or not
you want them as neighbors. If you do, move them into shelter
someplace other than on top of the remains of your unharvested
oats. Don't immediately dismiss men in orange uniforms bearing
the names of prisons. Not all murderers are bad people... I know
a few of 'em I would love to have as a neighbor... especially in
this kind of world. Criminals are sometimes useful individuals
who made errors in judgment. Just be careful with them. Most of
those guys really do belong in the cage.
If you think you'd be better off without them as a group, be
polite, but firm. Load them up with as much water as they can
carry, give them a gallon of gasoline... the “last” gallon you
have... for their vehicle, if in fact they are out of gas, and
send them on their way to a refugee collection point. There will
usually be radio broadcasts advising where to go for food,
shelter, and medical care.
The gallon of gas you give them will buy you their good will, it
will get them at least fifteen or twenty miles away from you, and
it is less valuable than the ammunition you would have to expend
in killing the entire party.
If you have to shoot, you do it quickly, you dig a hole, you keep
your mouth shut. This is to be avoided as much as possible.
Gunfighters never live long. You cannot stand alone, and the more
people in the community, the better the chances of collective
survival. Remember, the Chinese may be on the march, or the
Russians, or even the Mexicans or Canadians. We will not even
discuss local bandits, which are more likely than foreign powers
who will have problems of their own.
At the risk of being labeled a racist, I will address the issue
of race despite being a White Anglo-Saxon Protestant. This
is, of course, sacriledge to a liberal, and I am going to be
branded a racist no matter what I say. Therefore, I will
speak the truth as I see it, shoot straight, and let the chips
fall where they may.
Back in the innocent age circa 1975 or so, I tended to believe
the prevalent propaganda spewed out by the media that "Black is
Beautiful". Somehow, I came to the belief that all Black
people were God-fearing men and women who lived in poverty only
because White men forced them to live that way. This belief
had some truth behind it, but was woefully inaccurate when
applied universally.
Upon my inception into the US Army, I was divested of that
notion, realizing that Black people were no better than anyone
else... and later in life, I came to realize that as a group they
tended to be somewhat ignorant and stupid, prone to violence, and
often given to immoral behavior. That said, I have to point
out that these, or any other generalizations, do not apply to
every single individual of the Black race... or any other race,
for that matter. Individuals vary with the individual.
The unfortunate fact remains that a majority of violent crime in
the United States is commited by people of minority races...
Blacks leading the pack, for the most part. I will not get
into the reasons for this as those put forth by others are highly
debatable, and my premise here is quite inflamatory enough.
Suffice it to say that the reasons will end up being many and
varied, and probably the biggest problem that Blacks have as a
group was systematically engineered by evil White men. No,
not the KKK, but rather, liberal Democrats. The
institutions they implemented are collectively known generally as
social welfare programs and include or have included housing
allowance, food stamps, aid to families with dependent children,
and others. This "free lunch" program has caused more
damage to the poor and/or the Blacks than the KKK leadership
could ever have dreamed of. But that's another story...
It does NOT logically
follow that because a majority of crime in the United States is
done by Blacks, the majority of Blacks are criminals. Most
Black people, like most Mexicans, White Anglo-Saxons, Asians, or
any other race of people are no more prone to crime and violence
than anyone else. It DOES logically follow that a
neighborhood full of people who are as a group prone to crime and
violence will have high crime rates.
In the post-apocalyptic world, these are important things to
consider. You do not want to be living in a Black
neighborhood when the caca hits the fan... even if you are Black
yourself. Leave before the looting, robbing, raping,
burning and killing begins in earnest. If you choose to
leave a Black ghetto, however, remember to leave the ghetto
behind... don't bring it with you. That is excess baggage
you don't need to carry.
Outside of the ghetto, there will be White people. They'll
have guns. You will have to get along with them if you want
to survive. It has been said that niggers come in all
colors, and this is quite true. Nevertheless, having a dark
complexion should not be a license to act like a nigger.
Institutionalized slavery ended a a century ago and it is no
longer an excuse for bad behavior. This is a point to
remember.
Now some will wonder why this racist clap-trap is included
here. Two reasons. The first reason is a warning to
Blacks who choose to flee the inner city and try to survive out
in the open air. You will quite probably be tolerated...
but only if you behave yourselves. If you start behaving in
ways that are considered normal in the inner city ghettoes, your
White neighbors are not likely to accept you... and you need to
be accepted if you want to live.
Be polite. Leave the ghetto life behind... and make damned
certain your children behave as well. If you are driven
out, you will have no where else to go.
The second reason is the fact that many rural people have little
if any experience living among Blacks and other minorities.
I was probably into my teens before I actually saw a Black
person... and considerably older before I saw a Mexican.
Now I live in an inner city neighborhood in a small city where it
is at least as common to hear Spanish spoken on the street as
English. My next door neighbors are Mexican and a man
across the street is Black.
It should not be a matter of public policy in the
post-apocalyptic world to shoot Mexicans or Blacks on
sight. Not all Blacks, Mexicans, American Indians, or other
minority members are criminals. Neither, however, are they
all fine upstanding citizens. Remember, the man in your gun
site is an individual, not a group, so be careful not to make
your judgement based on group statistics. That man in your
site might just be another George Washington Carver... a genius
who will be badly needed when it comes time to plant crops again
after the worst is over. He could also be, however, another
Idi Amin... whom the world could easily do without.
One would hope that we could avoid a race war. This may not
be the case, however, so if your skin color becomes your uniform,
all bets are off. Civil war is a bloody thing, and
hopefully will be of limited duration, but it certainly could
happen, and dividing line could easily become one of race.
All the more reason to avoid conflicts if at all
possible.
Let others fight over the last scraps of food in a grocery store
or somebody else's attractive young wife. Sit quietly in
your little corner of the world and stay hidden if you can.
The neighbors you have now... before the bombs fall, will be your
best bets for allies. You know them, for one thing, or at least
you should. If you do not, you should set about rectifying that
state of affairs. If you see your neighbor with a tractor buried
to the axle, go over with a heavy chain and your own tractor or
SUV. If you take care of your neighbors, they will hopefully take
care of you some day.
Should you be so fortunate as to have an Amish or Mennonite
neighbor, get down on your knees immediately and praise God with
a loud voice! Your neighbor is an absolute “rock star” at living
off the grid. He'll have horses, oxen, hand tools, harnesses,
wagons, stored food and probably Kerosene. He'll also have skills
that you don't have. If he is willing to talk to the English at
all, he'll talk to his neighbor. It helps if you can speak a bit
of German as well. He'll probably speak “Plat Deutsch”, a dialect
that is a bit different from the “Hoch Deutsch” taught in
American schools, but he'll be able to understand you and will
appreciate that you made the effort. When he discovers that his
neighbor is a blacksmith, he will likely spread the word to the
rest of the Amish.
This is a good thing. When the fuel runs out, you will have been
able to negotiate for a good draft horse and a wagon. Possibly
even a wife or an apprentice to help you out in the smithy.
After the bombs fall, we'll all be Amish.... whether we like it
or not! In the grand scheme of things, though, there are worse
things to be.
Chapter
XI Weapons
 t seems to be a
given that any discussion of the end times, or survivalist
doctrine in general must contain a section on weapons. So
we come to the final chapter and I must weigh in on the subject
as well. Having spent the better part of a decade engaged
in the selling and servicing of firearms, and more than fifteen
years in military service, I am somewhat qualified, though no
more so than Miles or many others.
t seems to be a
given that any discussion of the end times, or survivalist
doctrine in general must contain a section on weapons. So
we come to the final chapter and I must weigh in on the subject
as well. Having spent the better part of a decade engaged
in the selling and servicing of firearms, and more than fifteen
years in military service, I am somewhat qualified, though no
more so than Miles or many others.
I will not address primitive weapons like the atlatl, boomerang,
sling, spear, or bow and arrow. All of these weapons have
their place in the post-apocalyptic world. I simply do not
have the time or the space to address every aspect of the
situation, and so I must eliminate some subjects I would like to
cover. Suffice it to say that a man armed with a sling or
an atlatl who knows what he is doing is better armed than a man
with a battleship who doesn't.
I will point out that primitive weapons tend to be absolutely
silent, seldom have laws regarding their use or possession, and
are easily made from base materials. If you have a length
of cord, a small piece of leather and a rock, you have the
makings of a sling and can kill small animals... or giants.
A straight peice of wood and a broken piece of glass can become
an arrow, quarrel, or spear. A bent piece of wood can be
made into a boomerang.
If you choose to carry and use primitive weapons like these in
the post-apocalyptic era, practice religiously and God be with
you, for everything else is against you.
Much of what I have to say is based on opinion... informed
opinion, but opinion nevertheless. "What's the best gun?"
in one variation or another, is probably the most commonly asked
question at the counter of any gun shop, followed closely by
"What's the best cartridge?".
Welllll.... there is no perfect answer to either of them.
All guns, from a Brown Bess musket to a Buck Rogers styled
directed energy beam weapon have their pros and cons. The
use to which the weapon is to be put will have much influence on
the choice of weapon. If you are planning to visit
Washington state for hunting, stainless steel has a certain
advantage.... but bad neighborhoods in Washington DC have needs
all their own.
As to cartridge choice, the various 30-'06 class cartridges are
so close ballistically as to be almost indistinguishable.
Everyone has their favorites. To me, if the cartridge does
what it is supposed to do, it's a win, if not, it should be
retired. We could eliminate all but ten chamberings and
there would still be plenty of choices left.
In point of fact, for survival, one would be better served by a
collection of weapons in various chamberings. For breaking
through roadblocks escaping from a city, keeping mobs at bay, or
similar martial activities, any of the AK-47 variants would be
ideal. (A better idea would be a letter of acceptance from
a well-known local resident of the community you are trying to
enter!) I would personally opt for one chambered in .223
Remington. Others would prefer a 12 gage Remington
870 riot gun. Later on, a rifle in .22 LR might be nice to
get game for the evening meal without drawing undue
attention. Handguns have their place, but mostly, that
place is hanging on the patriarch of the family's hip seldom if
ever to be fired. Others have other ideas. To each
his own.
What has all this to do with blacksmithing?
In the early days of firearms, it was the blacksmith who made the
firearms. It was the blacksmith who repaired them.
You will almost certainly be called upon to repair a firearm of
some type at one point or another. Most probably it will be
one of your own. This is only one area to consider when
choosing a weapon.
You'll need to defend yourself and your family. You'll also
likely wish to hunt or destroy pests who plague the garden... or
plague humans directly. Feral dogs frequently become a
problem in devastated areas. PETA be damned! In a war
zone, shoot all stray dogs on sight! The danger stray dogs
pose to unarmed humans cannot be overstated.
I implore you not to attempt to make a firearm from
scratch. Unless you are a gunsmith with a well equipped
shop, you will have, at best, a poorly made weapon that will not
shoot where it is aimed, and at worst, a bomb waiting to detonate
right next to... say... your wife's face. She will not be
happy with you, nor will anyone else.
There are also certain repairs not to attempt. Don't do
anything with the major parts of a weapon; the bolt, breach, or
barrel. Messing with these can get you killed. Find a
gunsmith for these kinds of things. You can learn how to
drill and tap for scope mounts, though I don't recommend it.
I would suggest that you confine your post-apocalyptic gun
repairs to stock replacement, parts replacement, cleaning, and
other minor repairs. One can attempt to make some springs,
but again stay away from things like firing pin return springs,
safety springs, trigger return springs, etc.
Muzzle-loading firearms with traditional exposed hammers, do lend
themselves to simple repairs. A broken hammer or
trigger-guard can easily be crafted by a skilled smith.
Unless you are a trained gunsmith, avoid major repairs to
firearms.
Miles has stated that hunting will be impossible at some
point. This is true, though that point will not happen
immediately.
In Northern Iraq, we looked high and low for wild animals, but
found very few alive. There was a large mongrel dog that
helped me guard the camp at night, a fox that was seen at a great
distance, and tiny fast-moving lizards. That was it.
Everything else had been killed and eaten by the Kurds.
As I write this, the deer population in Wisconsin is
bulging. There are herds that wander in among the barracks
on Fort McCoy. One would think that they were squirrels in
any public park, for all the attention they pay to soldiers who
walk among them. One would think that they would provide an
excellent food source in any disaster scenario.
Correct? Probably not.
In whatever version you choose to believe concerning the
extinction of dinosaurs, one thing is clear; the large herbivores
were the first to perish. They need foliage to survive...
and foliage is always the first food source to fail in any kind
of climatic alteration. A nuclear war will cause widespread
changes to temperature and available sunlight, as will many other
types of disasters.
Even if we discount such a disaster, with the distribution
network smashed, how long would one suppose the deer herd will
last with a starving population out hunting them? Probably
about as long as the park squirrels. Had the Kurds been
left much longer, I suspect even the mongrel dog (an unclean
animal under Islam) and the lizards would have been eaten.
Hunting will be sharply curtailed at some point, in the
post-apocalyptic era, but not completely gone.
In general, cartridge guns should be considered emergency
guns. Use them for self-defense only. Those
cartridges, even if we allow for reloading, are too precious to
waste. As to a choice of cartridge guns, I would suggest
avoiding everyone's favorite Colt AR-15 type rifle. It is
rugged, it is, contrary to popular belief, fairly reliable, the
.223 Remington rounds will be plentiful (or as plentiful as any
ammunition), and accuracy is fairly good.
The problem with this weapon is that it requires a fairly high
tech base to keep it operational. If you fall and break the
butt stock, you have to replace it somehow. You won't be
able to order a replacement stock. Thus, the
wood-stocked AK-47 in one version or another, which was designed
for low tech levels, is infinitely superior in the kind of world
I envision.
The best attribute of this weapon is also the worst problem;
semi-automatic capability. Untrained individuals tend to
use the "spray and pray" approach to war fighting, and they also
tend to take risks they probably shouldn't. This is fine
when one has a large combat load of ammunition and a truckload
waiting at the base camp, not to mention skilled medics.
When you have one case of ammo that has to last a decade, and
limited medical care, the balance tends to tip toward those who
avoid gunfights and guns that require marksmanship and thought
before expending a single round.
Shotguns are probably the most versatile weapon out there.
You can kill everything from an elephant to a hummingbird with a
shotgun loaded with suitable cartridges, and there are a plethora
of available cartridges. I have a preference for pump
shotguns. My favorite current production gun is the
Remington 870, though I much prefer the old Winchester Model
'97. I find an exposed hammer to be a comfort rather than a
concern.
A .410 bore shotgun has certain advantages in that the report is
fairly quiet compared to other gages. Brass cartridges can
be formed from old .303 Brittish shells that can be reloaded many
times.
 I own a Winchester Model 9410 lever-action shotgun, which is
pictured at left with an ornery old guy holding it. It
has certain tactical advantages that might not be
immediately noticed. As a home-defense weapon, it is almost
without peer, holding ten rounds of of .38 S&W
Special-equivalent ammunition. In an urban environment, it
is not likely to penetrate several walls and kill a little old
lady down the street walking her dog, yet it will impart lethal
wounds up close where most combat shooting is done.
I own a Winchester Model 9410 lever-action shotgun, which is
pictured at left with an ornery old guy holding it. It
has certain tactical advantages that might not be
immediately noticed. As a home-defense weapon, it is almost
without peer, holding ten rounds of of .38 S&W
Special-equivalent ammunition. In an urban environment, it
is not likely to penetrate several walls and kill a little old
lady down the street walking her dog, yet it will impart lethal
wounds up close where most combat shooting is done.
Loaded with 000 buckshot rounds, each shell holds three rounds
approximately thirty caliver in diameter. At close range...
say out to twenty five or thirty yards or so... I can put three
rounds on target faster than a man with a modern selective fire
weapon can manage, as I can do it with one shot instead of
three. If I need to kill a squirrel or rabbit for lunch,
number six or 7 1/2 shot will suffice. If longer range
shots are needed for coyote, human beings, or deer, slugs will
fit the bill... admittedly in a marginal capacity.
Further, designs like this (lever-actions in general) will be
among the last cartridge loading weapons to be rendered illegal
simply because there are so many of them out there.
Need I mention that you need at least a 12 gage to kill an
elephant?
Shot shells are heavy and fairly expensive. They also have
plastic cases that cannot be reloaded just too many times.
this needs to be considered at some point.
A .22 LR rifle is great. You can easily stock thousands of
shells for it and spend very little money doing so.
Everyone has a preference. I like Remington Nylon 66
rifles, though Winchester 9422 lever-actions are pretty nice as
well. Ruger 10/22 rifles are pretty hard to beat for a
modern production gun. There are many handguns that take
the same cartridge.
It goes without saying that one must learn to reload cartridges
if one plans to continue to use them. I cannot possibly
begin to address that topic though, and since Miles has covered
it elsewhere, I'll forgo it entirely.
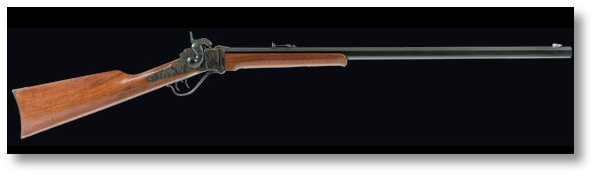
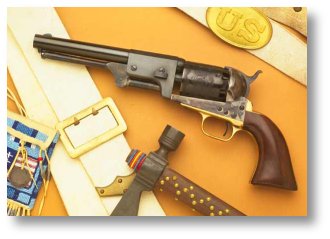 Muzzle-loaders, breach-loading percussion rifles like
the 1866 Sharps (above, photo courtesy Shilo Sharps Rifles) , and
percussion revolvers like the Colt Dragoon series (at left, photo
courtesy Cimarron
Fire Arms) do not require any cartridges. One needs a
supply of powder, caps, and lead balls. That's it.
One can dispense even with the caps if one wishes to use a
flint-lock, wheel-lock, or match-lock
weapon.
Muzzle-loaders, breach-loading percussion rifles like
the 1866 Sharps (above, photo courtesy Shilo Sharps Rifles) , and
percussion revolvers like the Colt Dragoon series (at left, photo
courtesy Cimarron
Fire Arms) do not require any cartridges. One needs a
supply of powder, caps, and lead balls. That's it.
One can dispense even with the caps if one wishes to use a
flint-lock, wheel-lock, or match-lock
weapon.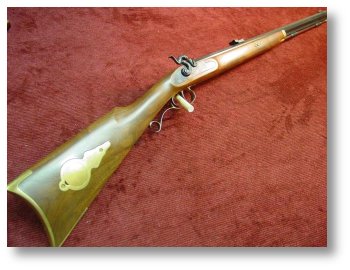 mpson/Center Cherokee rifle
currently for sale on line. I have one in .32 caliber and
have used it to good effect on squirrels and other small
game. With only 20 grains of powder, I can kill a squirrel
or a rabbit, which will supply my family with meat for a
day. Now, one pound of powder contains 7000 grains.
Doing the math... 7000/20 = 350 shots. Figuring that fffg
black powder costs about $15.00/lb, doing the math again...
that's a little over four cents a shot, plus the cost of the
projectile and the cap... figure a nickel for both, so about a
dime a shot.
mpson/Center Cherokee rifle
currently for sale on line. I have one in .32 caliber and
have used it to good effect on squirrels and other small
game. With only 20 grains of powder, I can kill a squirrel
or a rabbit, which will supply my family with meat for a
day. Now, one pound of powder contains 7000 grains.
Doing the math... 7000/20 = 350 shots. Figuring that fffg
black powder costs about $15.00/lb, doing the math again...
that's a little over four cents a shot, plus the cost of the
projectile and the cap... figure a nickel for both, so about a
dime a shot. 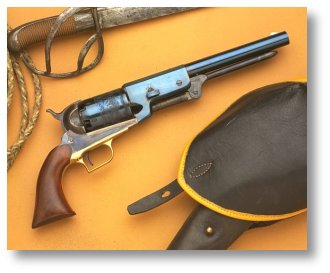 Consider the fact that the Colt Walker (at right, courtesy
of Cimarron Fire
Arms) and Dragoon revolvers packed more power than any
cartridge revolver until the advent of the .357 S&W Magnum in
1937. True, you only have five shots, six, if you are
foolish enough to load all the chambers. Remember, though,
that if one needs more than five shots to get out of a tight
spot, one has become involved in the wrong kind of business.he best way to survive the aftermath of a cataclysmic
event is to avoid it entirely. Squirrel your supplies away
to some location and get there yourself, avoiding all conflicts
along the way. Stay there and don't attract attention at
all.
Consider the fact that the Colt Walker (at right, courtesy
of Cimarron Fire
Arms) and Dragoon revolvers packed more power than any
cartridge revolver until the advent of the .357 S&W Magnum in
1937. True, you only have five shots, six, if you are
foolish enough to load all the chambers. Remember, though,
that if one needs more than five shots to get out of a tight
spot, one has become involved in the wrong kind of business.he best way to survive the aftermath of a cataclysmic
event is to avoid it entirely. Squirrel your supplies away
to some location and get there yourself, avoiding all conflicts
along the way. Stay there and don't attract attention at
all.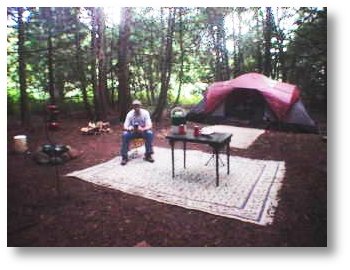 It should go without saying that you will not be living in a
four-bedroom house on top of a hill in sight of a major
highway. Rather, you want a tiny cabin inside a cedar
grove with a rusted steel building nearby for storage. If
you need quick temporary housing, a large tent such as shown at
left will suffice. This is not suitable for long-term
survival, however.
It should go without saying that you will not be living in a
four-bedroom house on top of a hill in sight of a major
highway. Rather, you want a tiny cabin inside a cedar
grove with a rusted steel building nearby for storage. If
you need quick temporary housing, a large tent such as shown at
left will suffice. This is not suitable for long-term
survival, however. 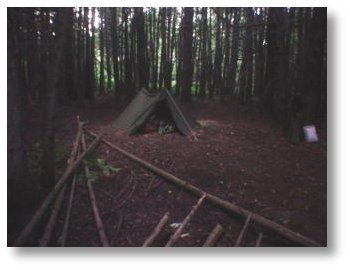 They are very sturdy
structures, but leave much to be desired as far as creature
comforts are concerned, and there is little room inside for more
than one or two people. I use this one for storage of
supplies that I don't want in my living tent. Gasoline for
my chainsaw does not go well with a lit lantern inside the
tent.
They are very sturdy
structures, but leave much to be desired as far as creature
comforts are concerned, and there is little room inside for more
than one or two people. I use this one for storage of
supplies that I don't want in my living tent. Gasoline for
my chainsaw does not go well with a lit lantern inside the
tent.